Tuesday, April 28, 2015

Moo-tiful Birthday

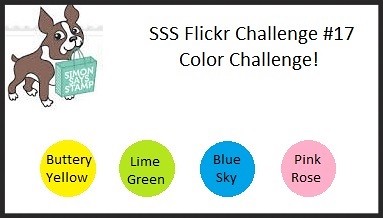
Barb over at the Simon Says Stamp Flickr Group has come up with a yummy colour combination for Flickr Challenge #17. Here are the colours we have to use -

SSS Flickr Challenge 17 - Color Challenge

The colours don't have to match shades exactly, so in the end I substituted a hot pink for the rose pink as I have lots of hot pink card which I never seem to use and thought it might go well with the other bold colours. Hopefully the bold colours I used won't hurt your eyes too much! I wanted to make a colourful background for the fun cow from Simon Says Stamp's Birthday Farm Animals set and made it with scraps of card and a die from WPlus9's Quilt Cuts 2 set. Instead of messing with a glue stick I find adding a large sticky label behind the frame of the quilt block is a quick and handy way to adhere the small pieces.


Stamp - Birthday Farm Animals set (Simon Says Stamp)
Die - Quilt Cuts 2 (WPlus9)


After stamping and cutting out the cow, I added some colour and shading.


Then I paper pieced the birthday banner and birthday hat. These days I can't seem to make a card without adding clear Wink of Stella and on this card added some shimmer to the hat and banner.


Monday, April 27, 2015

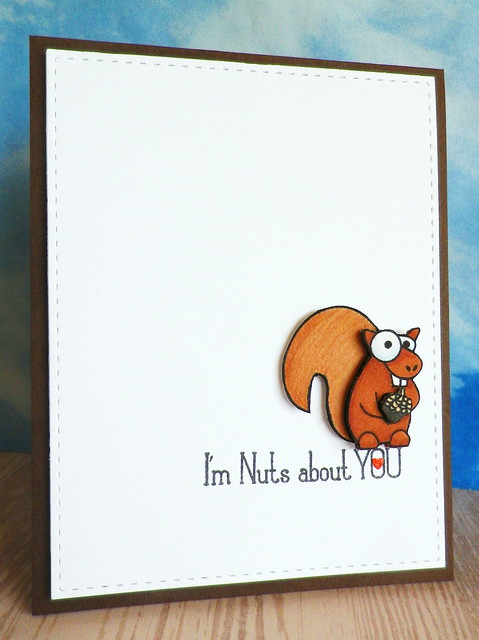
I'm Nuts About You

I thought it would be fun to join in on Simon Says Stamp's Clean and Simple Challenge and as I wanted to make a card for my hubby, pulled out one of the cute animals from Hero Arts Missing You set.

IMGP5532

Stamp set - Missing You (Hero Arts)
Die set - Bundle of Stitched Shapes (Simon Says Stamp)


After die cutting the rectangular panel with a die from Simon Says Stamp Bundle of Stitched Shapes set, I stamped the sentiment. I then punched the tiny heart, applied a layer of clear Wink of Stella and adhered it to the card. The squirrel was stamped twice. I coloured the first image fully and just coloured the main body of the second image. After cutting out the pieces I needed, I layered the images with foam pads to add some dimension. Then I stamped and cut out the nut, and again used a foam pad to stick it onto the squirrel.

Monday, April 13, 2015

Birthday Brunch

I needed to give my hands a break from all the snipping that's involved in finishing a raggy quilt so thought I make a card for an upcoming birthday.

To start with I mixed a white and a red watercolour paint to make various shades of pink. After applying paint to a panel of watercolour card, that had been moistened with water, I added some splashes in the stronger pinks. Once the panel was dry I added the "happy" die cut sentiment that was made up of three layers and the gold embossed sentiment panel.

IMGP5523

Stamps & die (Hero Arts) - Happy Stamp & Cut and It's Your Day

Then to finish I added a sprinkling of sequins and gems in various shades of pink. I don't eat much ice cream but every time I look at this card it reminds me of one ice cream that I do like, a brunch, and now I'd fancy having one! Because of the splashes of paint and the sparkle of the sequins and gems I thought the card would fit into the showers part of Simon Says Stamp's April Showers and\or Spring Flowers Challenge.

Friday, April 3, 2015

Happy Rainbow

It's a beautiful sunny day here today but this week we've had our fair share of rain and enjoyed seeing some spectacular rainbows. So I thought it might be fun to add a different kind of rainbow to my card today.


Stamps (Hero Arts) - Happy Stamp & Cut, Clouds Background & Fantastic Birthday


I started by inking up the clouds background stamp with salty ocean and faded jeans distress ink, spritzed it with water and stamped on white card. Then I die cut and stamped the sentiments and added a sprinkling of silver sequins to represent raindrops and also to use some of the big stash of sequins I seem to have accumulated in no time!

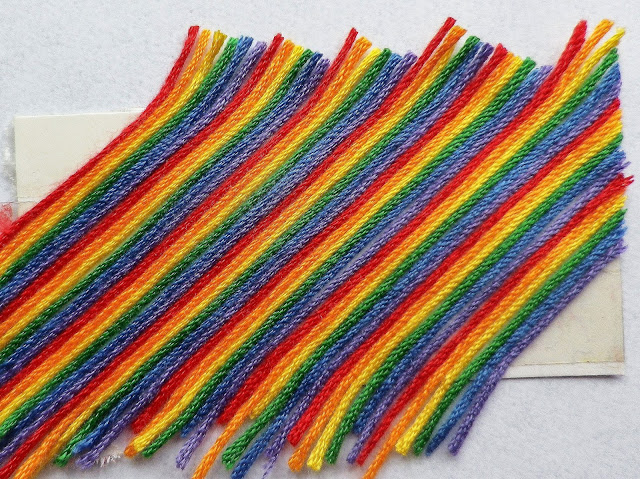
Next it was time to make my "rainbow". I applied double sided sticky tape to a piece of scrap card and added rows of embroidery thread in rainbow colours.


Then I trimmed the excess threads around the edges and added it to the back of the cloud panel.


After adhering the tiny extra pieces from the die cut sentiment I added strips of yellow card to the panel and used foam pads to adhere it to a red card base. I'm submitting this card into Simon Says Stamps' Happy Birthday Challenge.

Thursday, April 2, 2015

Happy Birthday Splash

A week ago I hurt my right hand and haven't been able to make anything. Oh it's been a long week as I'd been hoping to start putting together a quilt I'm making for my younger son. This morning my hand is feeling much better so I thought I'd test it out with a quick card and I'm happy to say that I think I'll be sewing this afternoon:)

To make the card I applied peacock feathers distress ink to an acrylic block, spritzed with water and stamped on white card. I repeated with the process until I was happy with the result. After the card had dried I stamped the sentiments - LOVE this gorgeous and versatile Stamp & Die set with Kelly Rasmussen's pretty handwriting. To finish the background I added a sprinkling of sequins.


Stamp - Happy Stamp & Cut (Hero Arts)
Dies - Isabella & Pippi Butterflies (Memory Box)


So then it was time to make my butterfly. I used scraps of black card and a piece of card, covered with spiced marmalade distress ink, which had been left over from another project.


After assembling the butterfly I attached it to the card using foam pads. I'm submitting this card into Simon Says Stamp's Happy Birthday Challenge.