Friday, July 26, 2013

Hero Arts Hostess Summer Picnic Blog Hop

Hello and welcome to your next picnic spot on the Hero Arts Hostess Summer Picnic Blog Hop!


If you’ve been following along the picnic trail, you should have just arrived from the blog of the talented Kryssi Ng. In case you come across a broken link or didn't begin at the start of the hop, you’ll find a master list of the hop links at the Hero Club Blog. Also please report broken links to blog@heroarts.com.

Hero Arts will be awarding prizes from randomly drawn comments. For a chance to win, simply comment on ANY of the stops along the hop on ANY day, including each day’s starting post at the Hero Club Blog. The more comments you leave, the better your chance of winning - best of luck! I have comment moderator switched on, so don’t worry if your comment doesn’t appear immediately.

Recently we’ve been enjoying the most glorious weather and have had lots of days out in some of our local scenic areas. Each time we’ve loaded up our wicker picnic basket, so for our virtual picnic today I thought I’d make a picnic basket shaped card.


Hero Arts Stamps – Picnic CL599, Designer Woodgrain S5208 and It’s a Day for a Cupcake AR171 (Archiver’s exclusive)

I die cut the basket using my Silhouette and stamped the outer layer and handles with the Designer Woodgrain stamp. The sentiment was heat embossed in white. Then I made a little tablecloth/blanket by repeatedly stamping the strawberry from the Picnic set on a triangle of white card and coloured it with ProMarkers. The borders were made from scraps of card left over from other projects. After stamping and cutting out the cupcakes, I added some dimension by adhering the “cream” topping with foam pads. Some swirls of stickles were applied for added sparkle and the “chocolate” and strawberries on the cupcakes were covered with a layer of Glossy Accents.


All week I’ve been enjoying this calorie free picnic and want to try out all the mouth watering recipes my Hosti sisters have provided. So now it’s my turn to come up with something for our picnic. One of my favourite summer time combinations is strawberries and cream, so pavlova is one of the (many!) desserts I love.


Hero Arts Stamps - Remember & Picnic

As well as being a cool and refreshing dessert, pavlova is also easy to make. If you’re having a garden picnic, the pavlova can come straight out of your fridge or if you’re going on a picnic out and about, just pop the pavlova or elements needed for the pavlova into your cooler box to keep chilled. With the recipe below you can either make one big pavlova or a batch of mini pavlovas as I did.


Since we have a coeliac in the family, it’s great to have this delicious dessert that can be enjoyed by all of us, even those on a gluten free diet. If you are making pavlovas for a coelic, please just ensure that the cornflour and white wine vinegar do not have any added gluten or have not been on a production line where they could have been contaminated by gluten. If you live in Ireland, just to let you know the Coeliac Society of Ireland produces a wonderful booklet that is an invaluable source of information and provides a comprehensive list of gluten free manufactured products on sale in Ireland. Anyway here is the recipe if you’d like to make mini pavlovas:

Mini Pavlovas

Ingredients

3 egg whites
6oz caster sugar
1 teaspoon cornflour
1 teaspoon vanilla essence
1 teaspoon white wine vinegar or lemon juice
½ pint cream
2 teaspoons icing sugar
Strawberries and cherries (or any other fruits) to decorate

Method

1. Line baking trays with non stick baking parchment.

2. Whisk egg whites until stiff. Whisk in the caster sugar a third at a time, each time whisking until the mixture is stiff and very shiny. Fold in the cornflour, vanilla essence and the white wine vinegar or lemon juice.

3. Spoon dollops of the mixture into small round shapes on the baking parchment. Form a hollow in the middle of the round mounds.

4. Bake at 130 C (250 F) for approximately 45 minutes or until pale brown and dry but a little soft in the centre. (If you are making 1 large pavlova, adjust the cooking time to 1 1/4 - 1 1/2 hours). Leave to cool slightly and peel off paper.

5. Whisk the cream until thick and fold in icing sugar. Spoon cream onto mini pavlovas and decorate with strawberries and cherries (or any other fruits).

6. Now sit back, relax and enjoy!

I've made my card and my dish so now it's time for me to find a lovely picnic spot. I'd dearly love to have all my Hosti sisters right here with me, so we could enjoy a little hike and picnic together overlooking the lakes at Glendalough, Co Wicklow.


I'd like to say a great big thanks to Hero Arts for letting us loose having us on the blog this week and of course for all the fab must have goodies it produces! Also a great big thanks to Deborah, who has put in an amazing amount of work behind the scenes for the hop and has had us all in giggles as she's let the cat out of the bag over on the Hero Arts blog about our shenanigans at the picnic!

But for the moment why don’t you join me in hopping over to the next stop on the Hero Arts Hostess Summer Picnic Blog Hop where we'll visit the lovely and talented Kathy Wade – I can’t wait to see what she has lined up for us! Thanks for visiting and enjoy the rest of the hop!

I'm submitting this card into the Simon Says Stamp Summer Food and/or Drink Challenge.

Saturday, July 20, 2013

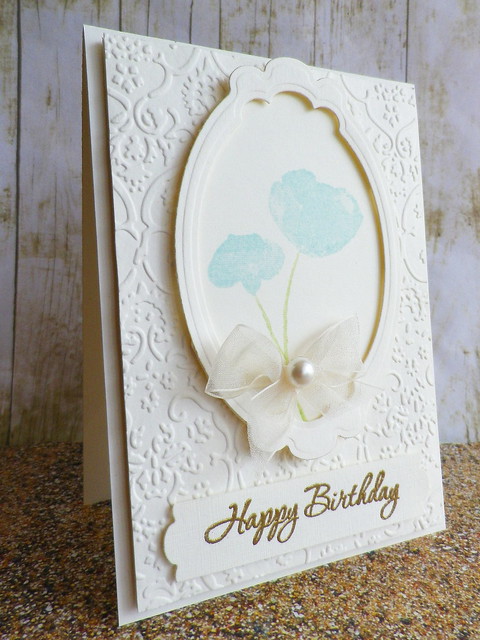
Happy Birthday

I arrived home yesterday evening to some very happy mail from my good friend Linda! Included with Linda's fab card and other beautiful goodies was the gorgeous Remember set from Hero Arts.

So first thing this morning I had to get inky! I love Cath's gorgeous Tuesday Trigger photo over at Moxie Fab World and have been wanting to play along since I saw the photo.

.

I love the pretty muted colours, texture of the lace, the sheer fabric, pearls and pretty scalloped edging so tried to incorporate these elements into my card.

Happy Birthday
Stamps (Hero Arts) - Remember & It's Your Day

To start with I embossed a panel and die cut a frame for the flower panel, using Labels 10 Nestabilities. The flowers were inked with Hero Arts' soft pool shadow ink and Memento's new sprout marker and stamped on cream card. I added an organza ribbon bow and pearl to finish the panel. The sentiment was embossed in gold and I die cut the tips of the sentiment strip with the Labels 10 Nestabilities so it would tie in with the frame.

Happy Birthday

I'm also submitting this card into the Birthday Card Challenge in the Moxie Fab World and the Die Cut Divas Summer Flowers Challenge. The sun is still shining here and we haven't had rain in over two weeks - I can't remember having a summer like this in such a long time! I hope you're having a lovely summer too:)

Monday, July 15, 2013

Mixy-Matchy Congratulations

As I tend to shy away for mixing lots of papers or patterns on my cards, I thought I'd have a go again and play along again with Cath's Mixy-Matchy Style Challenge in the Moxie Fab World.

IMGP1367

Stamp (Hero Arts) - Warmest Wedding Wishes

My good friend Linda sent me an exquisite Pink Paislee paper pad called London Market. The papers are so pretty and romantic looking, I couldn't wait to use them! Just to be a little more mixy matchy I teamed some of these papers with a brown text paper from a Docrafts Wellington Bear paper pad. To make the card I layered the papers and punched some circles for the scalloped border. After adhering the papers to the card base, I cut out an extra butterfly and popped it up on a foam pad. To finish I added lace and gems and embossed the sentiment.

I'm squeezing this card in on the last day of the challenge, but if you'd like to get mixy-matchy today too, you'll find all the details here.

Sunday, July 14, 2013

Flying Scramble

Last night Jayne hosted a fun and challenging scramble over at the Hero Arts Flickr group.

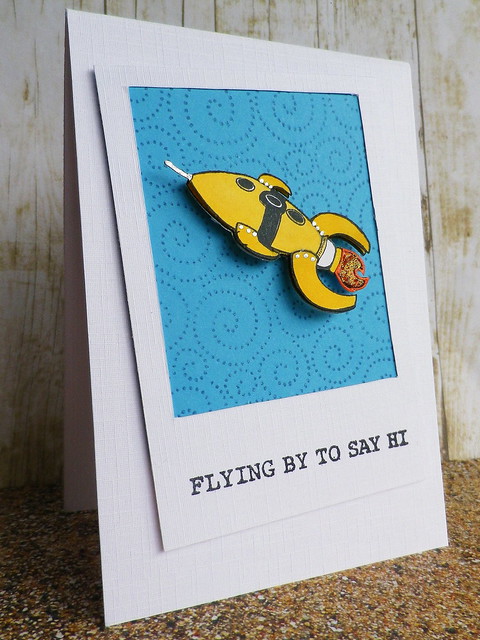
Jayne was inspired by baseball in picking the theme for her challenge and went for a triple play. I haven't a clue what that means in baseball terms but our scramble card had to include a triple play of trends - 1) use a photo frame 2) have at least one element on a slant and 3) have a metallic element.

Daytime photo of scramble card

Stamps (Hero Arts) - Magical Background, BAM! & Ghostly Greetings

I haven't had a chance to play along in the scrambles in quite a while and had forgotten how quickly those 90 minutes whizz by! The fact that about 20 minutes of my time was taken up searching for my craft knife didn't exactly help, lol! I had tried cutting the photo frame with a scissors but it looked so bockety that way! I've seen YouTube videos of people completing a card in 10 minutes - lol I don't think I'll ever be capable of that!

For the background I stamped the Magical Background on blue card using faded jeans distress ink. I stamped the rocket twice, coloured and layered in parts for some extra dimension. To complete the metallic element part of the theme I added gold stickles to the flame from the rocket and silver pen to the rivets and piece protruding from the rocket nose.


Yikes got a bit splodgy with the stamping but that's what happens when you're scrambling! The next scramble in the group will be hosted by Janet on 28th July. If you'd like to join in on this scramble you'll find more details here.

Thursday, July 4, 2013

Céad Míle Fáilte

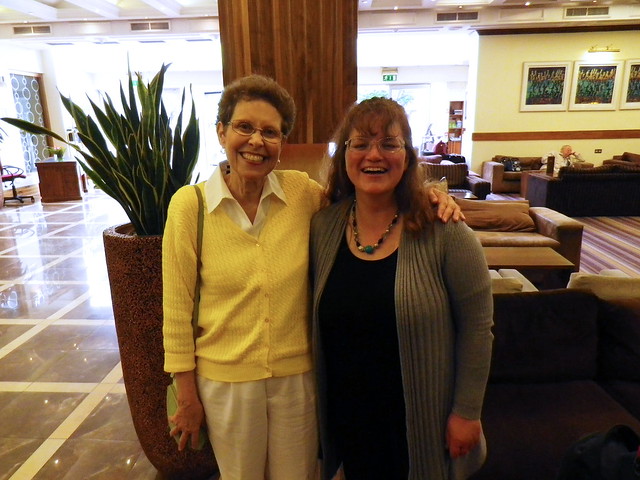
If you know me you'll know I love Hero Arts and the Hero Arts Flickr group. Over the years it has been brilliant getting to know members in the group and make great friends there. As most of the group live far away I never thought I'd actually get to meet anyone from the group in real life. But all that changed a few weeks ago when I finally had the pleasure of meeting Lin who is such a sweet and talented lady. On the day we met it was a beautiful sunny day so we decided to stroll around Dublin city centre to see the sights and pop into a few shops. My goodness we chatted non stop for hours - I had such an enjoyable and fun afternoon with Lin.

Lin's lovely hubby Denny took this photo of us when we had finished rambling around Dublin. As you can see from the photo he had us both giggling away!

Lin and me

As part of our stroll around Dublin we went into Trinity College which is such a peaceful oasis in the middle of the city. Here's student Lin!

Lin in Trinity College, Dublin

When I used to work in the city, the greens at the back of the college were a great place for a summer lunchtime picnic.

I have already received gorgeous cards from Lin but look at this beauty which she presented me with along with a very meaningful and thoughtful gift on the day we met. It's so Lin, I love it!

Lin's fabulous card

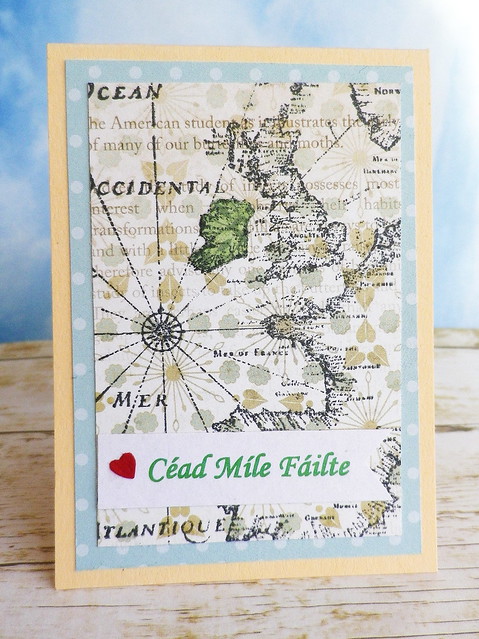
This is an ATC I made to say a hundred thousand welcomes (céad míle fáilte) to Lin. My friend Trinh sent me lots of pretty papers one of which I used on the main panel. It was only when I took the photo of the ATC that I noticed the text in the upper left hand corner contained the word "American" - what a happy coincidence! I hope Lin did find Ireland a very welcoming place to visit and I'm hoping to see her back here again some day very soon!

Céad Míle Fáilte ATC

Stamp (Hero Arts) - Collage Postcard
Related Posts with Thumbnails