Showing posts with label baker’s twine. Show all posts

Wednesday, October 5, 2016

Non Traditional Christmas

Over at The Love! - Handmade cards, ATC’s & other Crafts group on Flickr there's a fun challenge for October. It's to make a holiday project in non traditional colours. I have to admit I usually make my Christmas cards in traditional colours, but with this challenge decided to go a bit wild (for me:)) with colours and used a lot of black which is another colour I wouldn't usually use on Christmas cards.


Stamps (Hero Arts) - Ornaments Stamp & Cut and Vintage Post (sentiment)
Die (My Favorite Things) - Pierced Rectangle Frames


I die cut the frame, adhered it with foam pads to a panel of black glitter card and again used foam pads to adhere this to my card base. Then I coloured and added Wink of Stella to baubles images my friend Linda sent me (thanks again, Linda!) and added bows made from baker's twine. I really enjoyed trying out different colours on my Christmas card so will definitely make a few more Christmas cards this year using non traditional colours.


Tuesday, July 12, 2016

CAS Christmas

It's time again to set a Christmas card challenge for my friend Linda and this week it's going to be a CAS Christmas card. I have to say CAS cards are definitely a challenge for me but I thought I'd give it a go anyway this week. I see Linda has already posted a challenge for me here on her blog - can't wait to make a start on something!

After die cutting a window and stamping a sentiment on a panel of white card, I added a little elf peeking out of the window. I adhered an embossed circle to the card base before attaching the panel with foam pads. To finish I applied stickles to the trim and bobble on the elf's hat. It was such a quick and easy card to make especially as I had the elf image already coloured with Promarkers and ready to go on a card.


Stamps - Santa's Elves Stamp & Cut (Hero Arts) & Woodland Wreaths (WPlus9)
Die - Nestabilities Circles (Spellbinders)
Embossing folder - Cuttlebug Lace Tree (Provo Craft)


For my matching tag I used another elf image from the same Hero Arts set and sandwiched baker's twine between the embossed circle and a backing circle.


Stamp - Santa's Elves Stamp & Cut (Hero Arts)
Die - Nestabilities Circles (Spellbinders)
Embossing folder - Cuttlebug Lace Tree (Provo Craft)


If you'd like to join in on Linda's challenge and/or mine we'd love you to add a link to your card on either of our blogs.

Thursday, July 7, 2016

Linda's Christmas Tree Challenge

The other day my friend Linda set a challenge to make a Christmas card with a tree on it. You'll find the challenge and Linda's gorgeous Christmas card with a tree here on her blog.

To start I embossed a panel of kraft card and after adhering it to the card base added baker's twine borders - just love using red and white baker's twine on Christmas cards! I wanted to use Lawn Fawn's super cute Trim the Tree set so after a little stamping, colouring and cutting had a decorated tree to add to the card. I've added stickles to the star and Glossy Accents to the lights but, unfortunately, with the overcast conditions here didn't manage to pick up the sparkle and shine in my photo.


Stamp set - Trim the Tree (Lawn Fawn)
Embossing Folder - Snowflakes (Cuttlebug)


While I had my supplies out I also made a matching gift tag.

Stamp set - Trim the Tree (Lawn Fawn)

I'm happy to have added two cards and tags to my stash for Christmas and since Linda and I are going to set each other Christmas card challenges each week in July and August I should have a nice little pile of cards and tags by September.

Saturday, October 24, 2015

Snowflake Card and Bag

I love using kraft, white and red on Christmas projects and as I still had Hero Arts Hand Drawn Snowflakes and Fancy Cut Christmas out on my table, I thought I'd make another Christmas card and a matching gift bag.


To make the card I white embossed the snowflakes on a panel of kraft card and applied white ink around the edges. After die cutting the sentiment out of the panel I die cut the sentiment again from glitter card and inlaid it into the panel. For some extra sparkle I added a sprinkling of gems.


Hero Arts - Hand Drawn Snowflakes and Fancy Cut Christmas

Next it was on to my gift bag. After die cutting the bag, I embossed snowflakes on the back and front panel. Again I used the inlaid technique and added some gems and baker's twine once the bag was assembled.


Hero Arts - Hand Drawn Snowflakes and Fancy Cut Christmas
Lawn Fawn - Goodie Bag Die

I'm submitting the card into Hero Arts Holiday Card Making Challenge and the gift bag into Simon Says Stamp Wrap It Up Challenge.

Thursday, October 1, 2015

Happy Birthday Rocket

I wanted to make a birthday card with a space theme for a two year old boy so pulled out a cute freebie stamp set (Rocket Thanks) that Hero Arts recently gave out with orders.

After stamping and cutting out the rocket, I coloured it with Promarkers and added stardust stickles to the flame. The star background was made by applying distress inks (salty ocean, peacock feathers & faded jeans) to white card and stamping the stars in faded jeans distress ink.


Stamps (Hero Arts) - Rocket Thanks, Fantastic Birthday & Tiny Star Background
Die (Tonic) - Advent Drawer Deco Die


I die cut numbers out of the side of the card base and added a panel of acetate behind the number two so that I could inlay the birthday boy's age. As I wanted it to appear that the rocket flame had ignited the number, I coloured it in the same colour as the flame and applied stardust stickles.


I'm submitting this card into Allsorts' Numbers Challenge and Simon Says Stamp's Anything Goes Challenge.

Wednesday, December 24, 2014

Last of the Tags and Happy Christmas

This Christmas Eve has been very relaxed with no work and no major shopping left to do. So when my older son asked me to make some gift tags to put on his pressies for us, I made made them straight away, and since I had all the bits and pieces out, made ten more for next Christmas. Now hopefully in 12 months time I'll remember where I've put them!

Here are the first three tags I made today with a Docrafts die that I have used so many times this year in the lead up to Christmas - love it!


Die - Do Not Open Tag (Docrafts)


The tags were mainly made from card scraps. I used one of the new techniques that I came across and loved this year - inlay die cutting. I'm submitting these tags into Simon Says Stamp's Anything Goes Challenge.

Now I’m off to do a bit of preparation for tomorrow so I want to wish you a very Happy Christmas and hope that you will enjoy good health, happiness and lots of inky fun in 2015!


Thursday, September 4, 2014

Trick or Treat

I know it might be a bit early to be making Halloween bits and pieces but when I was out shopping earlier I noticed that some Christmas items are already creeping onto the shelves, so maybe I'm not too early for Halloween after all!

Anyway there are a couple of challenges I wanted to play along with - Teri's Fabulous Friday Challenge over at Moxie Fab World and Simon Says Stamp's Stamp It Challenge


The photo above is the one to be used for inspiration for the Moxie Fab World Challenge. It inspired me to make a garland, use yellow, orange and black, and also to use chevrons and triangles. For the Simon Says Stamp Challenge you have to stamp - lol I love nothing better:)

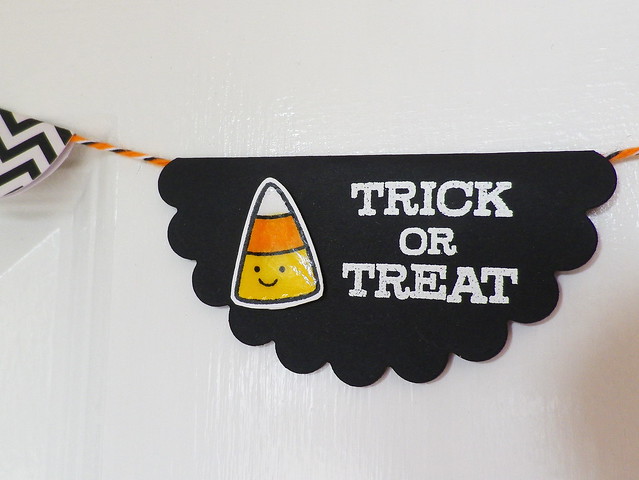
So first up is the little garland. I die cut circles from plain paper and patterned paper. On the orange ones I stamped Hero Arts' Tiny Flags using spiced marmalade distress ink and on the black circle I embossed the Lawn Fawn sentiment from the Trick or Treat set.
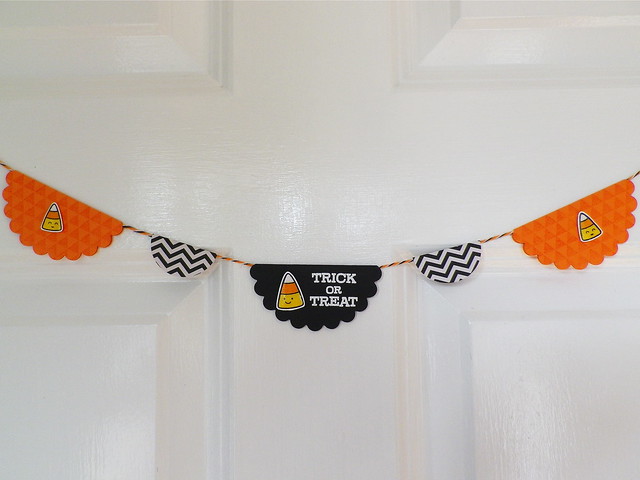
IMGP3937

Stamps - Trick or Treat (Lawn Fawn) & Tiny Flags (Hero Arts)

The cute candy corns which are from the same set were stamped, coloured with ProMarkers and covered with glossy accents.
IMGP3909

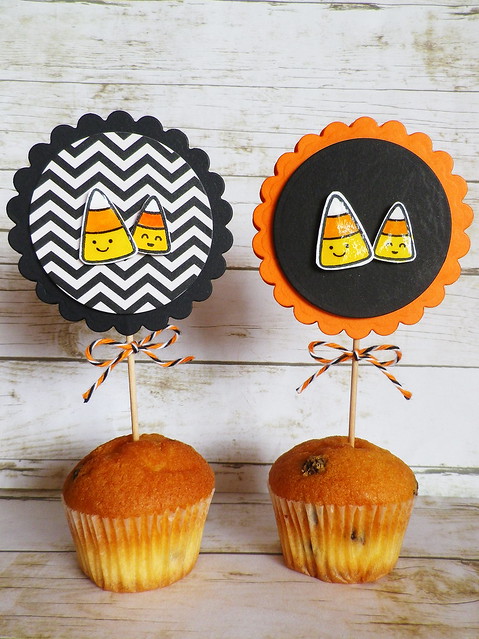
Next up are a couple of cupcake toppers, again using the same dies and stamps. At Halloween they will be stuck in cupcakes that are spookier than the mini chocolate chip ones I have here:)
IMGP3918

Stamp set - Trick or Treat (Lawn Fawn)

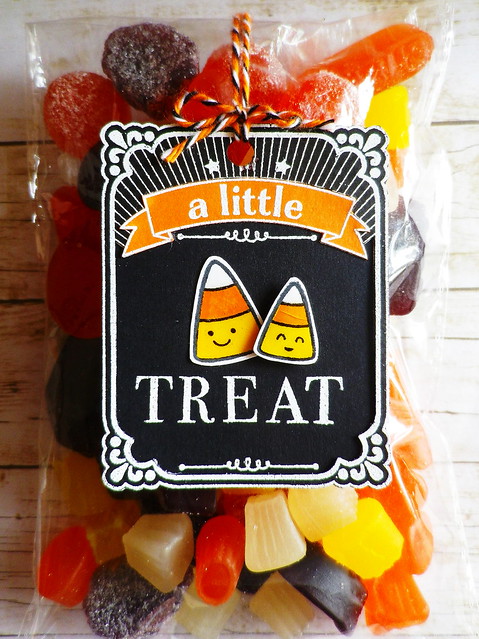
Well since Halloween wouldn't be Halloween without treats, I had to make up a little bag of treats and a tag.
IMGP3934


Stamps - A Little (Hero Arts) & Trick or Treat (Lawn Fawn)


The tag was embossed and pieced and I again added candy corns that had been coloured and glossed. I used baker's twine from a Halloween assortment pack from Doodlebug Design. Only a little over eight weeks to Halloween now but I think these treats might be eaten a little before then;)


Sunday, August 24, 2014

Batty Halloween Wishes

CAS cards are something I really struggle with, so today I thought I'd have another go a making one for Halloween. I wanted to join in on Lawnscaping's Texture Challenge so added bits of texture here and there on my card.


I started by stamping the sentiment in spiced marmalade distress ink on a panel of white card.


Stamps - Trick or Treat (Lawn Fawn) & Ghostly Greetings (Hero Arts)

After stamping and cutting out the bat, I coloured it with ProMarkers and added a couple of googly eyes before adhering it to the panel with foam pads. The panel was layered on orange textured card and I added a piece of baker's twine for some more texture. I added the panel to the card with foam pads. Well that's one thing about CAS cards - the descriptions are pretty short and sweet! Enjoy the rest of your weekend:)


Thursday, July 10, 2014

Butterfly Hello

I enjoyed making this shaker card the other day so wanted to make another one today using a pretty Memory Box die (thanks again, Linda!) and a couple of Hero Arts stamps.


Die - Isabella Butterfly (Memory Box)
Stamps - Be Happy & Messages With Flourish (Hero Arts)


I started by making a black card and embossing the sentiment. After cutting the butterflies out of a panel, I layered a strip of acetate to the back of the panel and partially adhered the butterflies' bodies. A coat of glossy accents was applied to the bodies and the stamped butterfly trails were added.

To make the colourful backs for the butterflies, I applied various distress inks (broken china, tumbled glass, mowed lawn, shabby shutters, spiced marmalade, worn lipstick and spun sugar) to white card and splattered/spritzed the card with water. Clear glass beads were trapped between the acetate and backing layer. After adding the panel to the card, I adhered strips of baker's twine to the sides.


I'm submitting this card into Simon Says Stamp Let's Be Clear Challenge ( I used clear beads, acetate, glossy accents and clear stamps) and Virginia's View Die Cut Challenge.

Monday, April 28, 2014

Trio of Crazy Critters

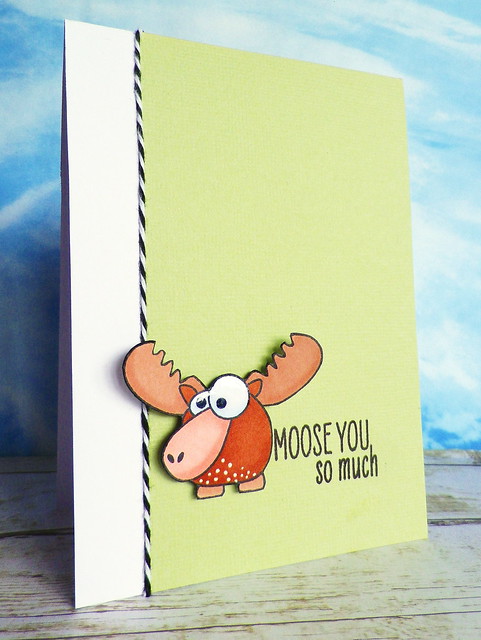
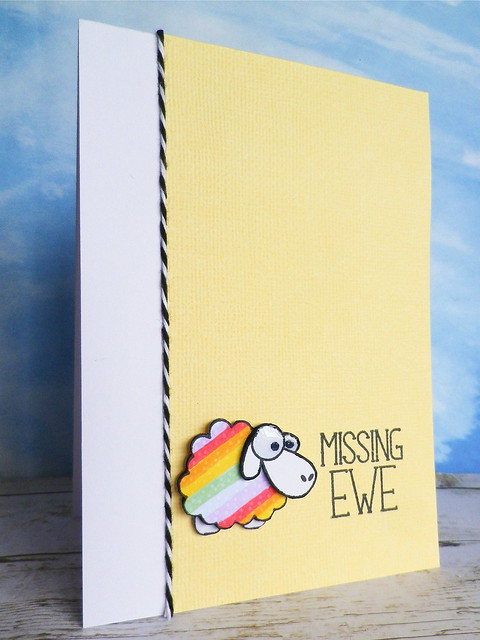
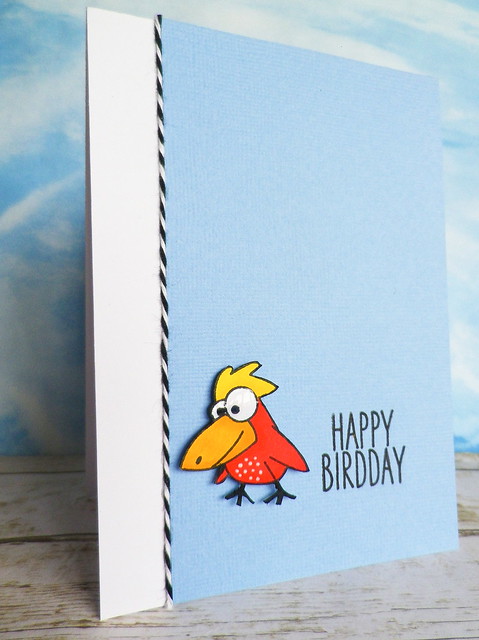
I can't tell you how much I love the crazy critters and funny sentiments in the Hero Arts OWH Missing You set. Every time I look at the images I have to smile:) The set arrived here last week and I've lost track of the number of critters I've stamped, cut out and coloured. I've been having lots of fun doing that but decided I better put some on cards and I ended up with a trio of cards - I think I have the makings for over 20 more cards!

First up is the funny moose. After colouring him with ProMarkers I just added a little Glossy Accents to his eyes and some dots to his tummy.

Moose You So Much

Stamp set (Hero Arts) - Missing You


I must have been in a dotty humour because I added rainbow stripes to the sheep's fleece and dotted it with a blender pen.

Missing Ewe

Last up is the bird with his fun mohawk. Again he was coloured with ProMakers and got the dotty treatment on his tummy.

Happy Birdday

I'm submitting these cards into Simon Says Stamp Clean and Simple Challenge, A Blog Named Hero Layer Cake Challenge and Hero Arts Sketch Challenge.

Saturday, September 21, 2013

Splatter Ghosts

When I was playing with images from the Brush Strokes set from Hero Arts, the bigger splatters reminded me of the fingerprint ghosts my boys used to make in school when they were younger. So I thought I'd make a Halloween card using these splatters.

Splatter Ghosts

Stamps (Hero Arts) - Ghostly Greetings & Brush Strokes


I embossed the splatters on black card and cut eyes and mouths out of black card. After adhering these to the ghosts I applied a layer of glossy accents for some sheen. It's impossible to see from the photo but I also stamped some cobwebs in black on the background. The sentiment was also embossed and I popped up the little ghost on the sentiment panel on a foam pad. To finish I just added a few gems and baker's twine.

I'm submitting this card into the current Hero Arts Challenge as the card was inspired by the super cute Halloween card (splatters on the background and popped up ghost) on page 28 of Hero Arts' Holiday & Stamp Your Story catalogue. Edited to add - I've just found out that Lisa Spangler made the card in the catalogue. You can see more on her fun card here.

Hope you are having a fun and inky weekend!


Wednesday, October 17, 2012

Reindeer Tag in Paper Crafts Magazine

The past week has been busy, busy for me and I haven’t had a chance to make anything. So today I’m sharing a gift tag which was published in the November/December issue of Paper Crafts Magazine. I still have to pinch myself when I see something I’ve made in a magazine! I think I may also have a card in the digital version of the magazine but can’t access it at the moment.


Stamp (Hero Arts) - Christmas Reindeer set

In my last post I used the cute reindeer from Hero Arts’ Christmas Reindeer set to make cards and this time I made a gift tag by enlarging the image a bit. I think I’ll also use the reindeer to stamp wrapping paper so I’ll be getting a lot of use out of that set! Here’s a photo of the tag in the magazine.


I keep browsing through the magazine and am getting lots of ideas for my Christmas cards and tags for this year. I also love the “Set the Table” section which is full of amazing ideas for menus, placemats, napkin holders etc for the festive table. Hopefully this year I’ll get to try to make something special for our table for Christmas Day.


I'm afraid I'm going to be a very patchy blogger for the next little while as I'm very busy at work and home and am also starting to gear up for this year's craft fair - hopefully I'll be popping in every now and again though!

Thursday, June 14, 2012

A Bumpy Road

The current challenge over at the Hero Arts’ blog includes a thinking of you theme. So to symbolise “I’m with you”, I decided to connect two die cut bicycles to form a tandem.

A Bumpy Road
Stamps (Hero Arts) - Flourish Background, Envelope Pattern and Everyday Sayings

To start with, I inked a piece of card with tumbled glass distress ink and then stamped the flourish background using the same ink. Then I applied distress inks (shabby shutters, pumice stone and antique linen) to another piece of white card to form the hills and bumpy road. This was stamped with the envelope pattern using shabby shutters distress ink. The bicycles, from Hero Arts, were cut using my new Silhouette Cameo (I’m in love!) and I just did a bit of welding and cutting to form the tandem. To finish I added some heart gems and baker’s twine.

Tuesday, August 16, 2011

Fabric Flowers for Friends

I love making fabric flowers and over the weekend spent time making them for some friends. Instead of just putting the flowers in an envelope, I make a holder for them and also a little card with a tiny fabric flower to match.

Flowers for Friends
Stamps (Hero Arts) – Be Happy, Clouds Background, Antique Engravings & Sew Artsy

A tutorial for the fabric flowers can be found here. I applied tumbled glass distress ink to the Clouds Background, lightly spritzed with water and stamped on white card.

DSCN8738

The butterflies were stamped on scraps of white card which had barn door distress ink applied. I used some patterned paper for the grass\leaves and a little piece of baker’s twine for the flower stem.


Just to show the size of the tiny flower on the card.

I'm submitting these projects into the Fabric\Felt Challenge at Lily Pad Cards, Creative Card Crew's Hand Made Flowers Challenge, Paper Creations Ink's Show Us Your Flowers Challenge and also the current Hero Arts Challenge.
Related Posts with Thumbnails