When I was making ATCs for the current
Hero Arts challenge, I thought it would be fun if a group of us got together to do an ATC swap. So that’s exactly what a bunch of us did in the
Hero Arts Flickr Group. With the random draw it turned out that my ATC swap buddy was
Marijke in the Netherlands.
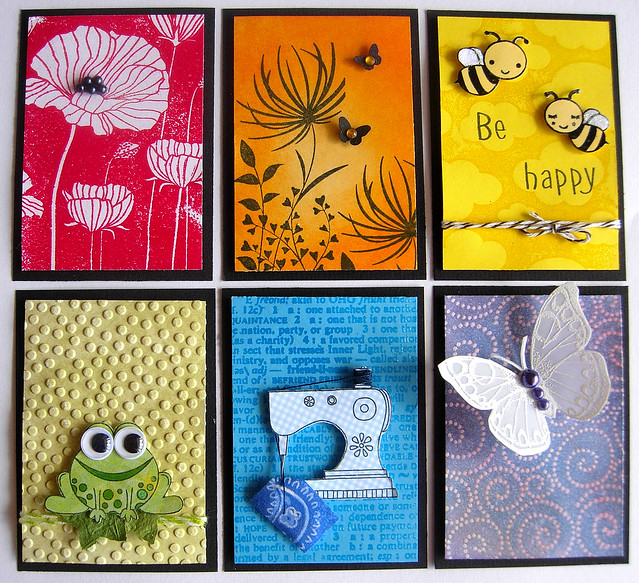
It’s been great getting to know Marijke a bit better through the swap and I was delighted that she was as keen as me to swap quite a few ATCs! We decided to swap six and wanted to surprise each other with our ATCs so didn’t mention a particular theme or stamps. I sent two ATCs I had already made this month – the
owls from here and the
bees from here.
For the other four I tried to incorporate a bit of both of us and what we like into them. Marijke loves flowers and nature and with her being from the Netherlands I had to include some orange (reminds me of when I see the Dutch football team on tv!). For me I included some of my favourite things – fabric, vellum and patchwork. The typewriter with the Friend Definition background represents all the emails we've sent each other for the swap. Marijke has received her ATCs so here they are:
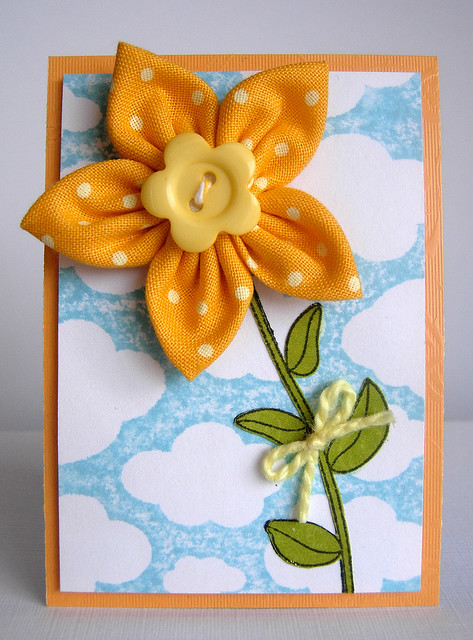 Stamps (Hero Arts) - Clouds & Big And Small Flowers
The clouds are stamped with tumbled glass distress ink. I paper pieced the leaves\stem and made the fabric flower.
Sally kindly sent me the baker's twine I used on the button - thanks again Sally!
 Stamps (Hero Arts) - Sew Artsy
Using patterned paper I made a little strip quilt pattern for the background. I coloured the sewing machine with watercolour pencils and covered with a layer of Glossy Accents.
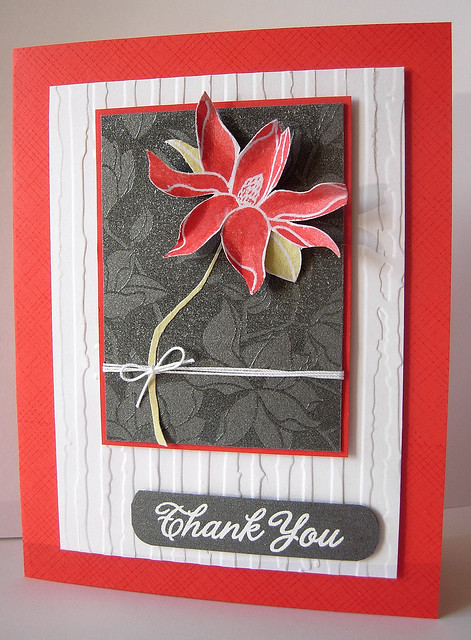
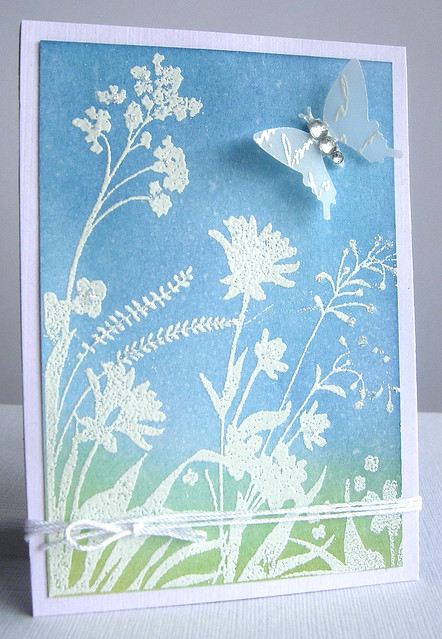 Stamps (Hero Arts) - Happy Wishes & Old Letter Writing
I applied broken china, faded jeans and shabby shutters distress inks to white card and spritzed lightly with water. Then I white embossed the Happy Wishes image and added touches of diamond stickles here and there. The butterfly was punched from a piece of vellum which had been white embossed with the Old Letter Writing.
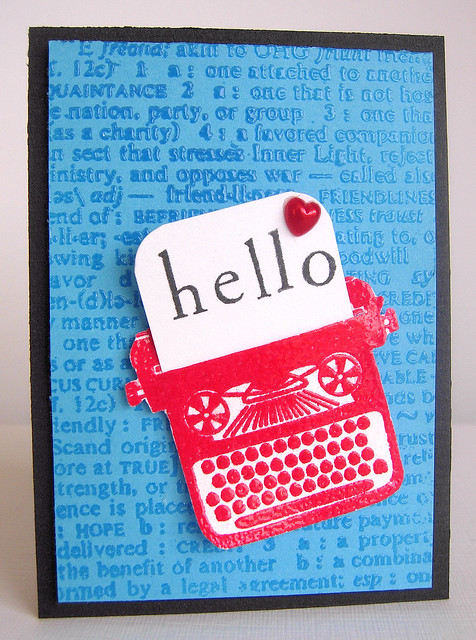 Stamps (Hero Arts) - Type, Friend Definition & Small Variety Alphabet.
The typewriter was embossed using red embossing powder and the background was clear embossed. I used some letters from the alphabet set to create the message and just added a pearl heart to finish.
If you are still awake after this loooong post, well done!! Hope you all are having a fab weekend!