Saturday, December 31, 2011

Christmas cards from friends, a little giveaway and Happy New Year!

I’ve always loved receiving Christmas cards, but since I joined the Hero Arts Flickr Group and started receiving cards from friends there, my delight in receiving Christmas cards has increased tenfold! There really is nothing like a handmade card and even though I’ve oohed and aahed over countless cards I’ve seen on various websites and blogs, there’s nothing like holding one in your own hands and being able to truly see the amazing detail and work that has gone into creating it.

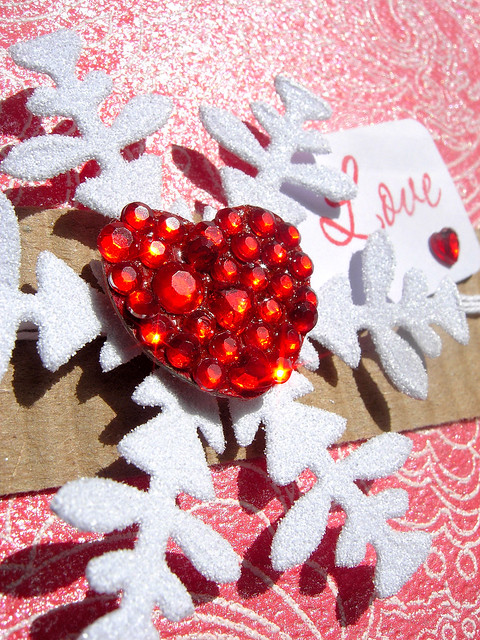
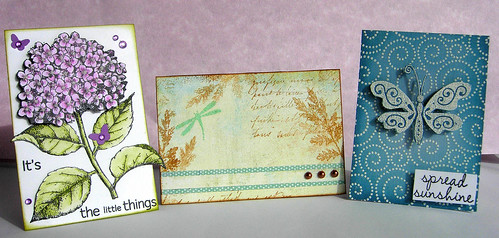
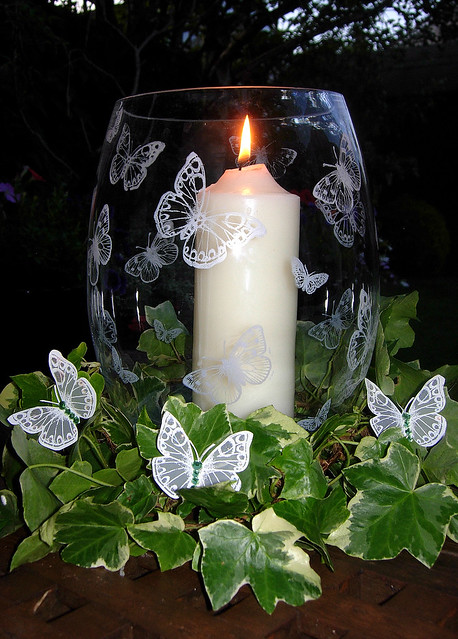
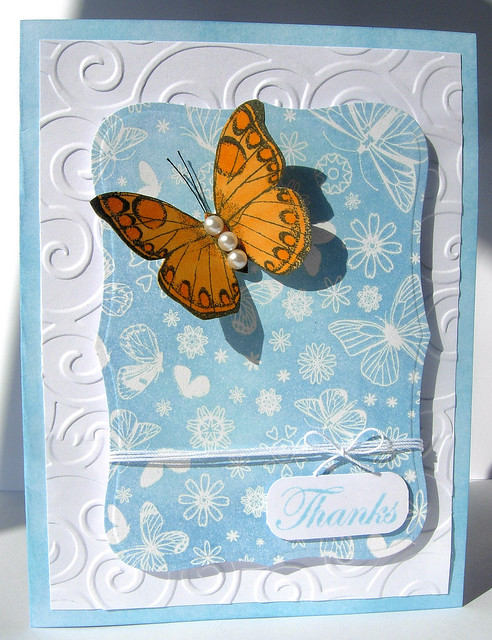
Anyway scattered through this post are the beauties I was so lucky to receive this year.
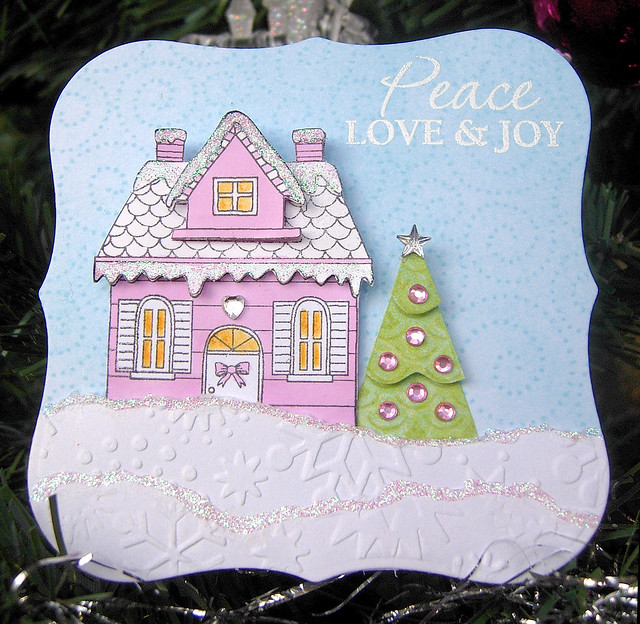
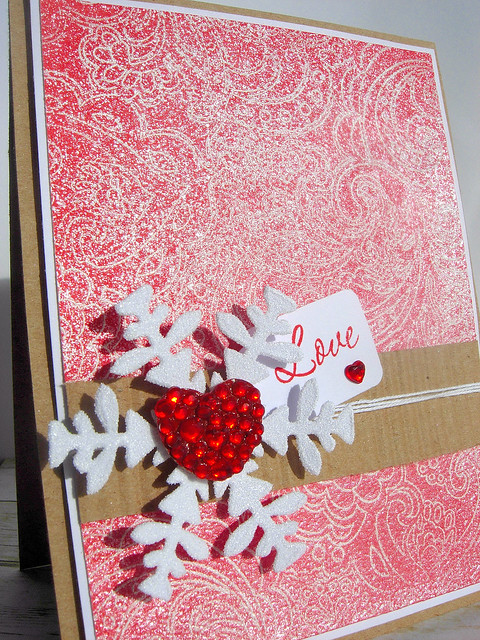
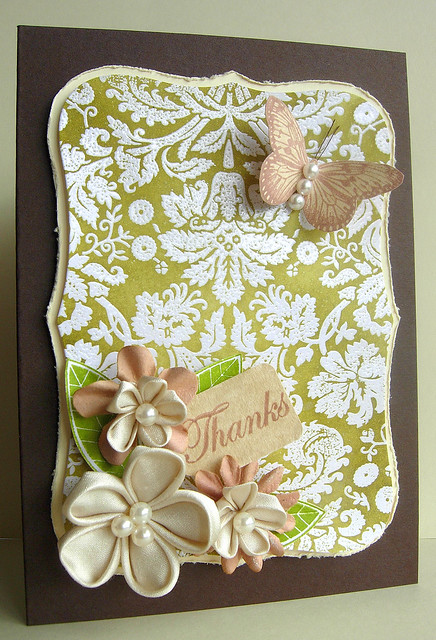
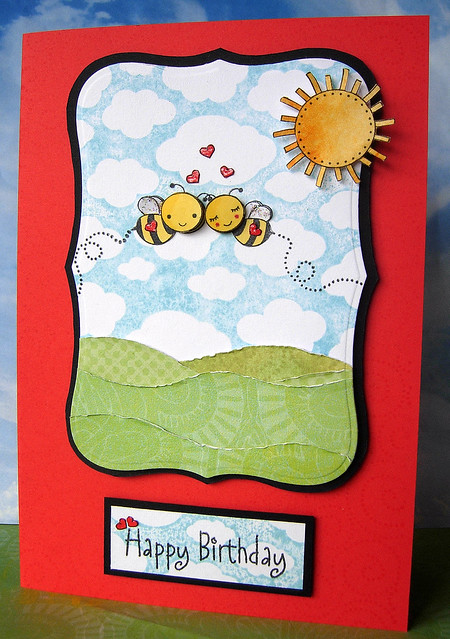
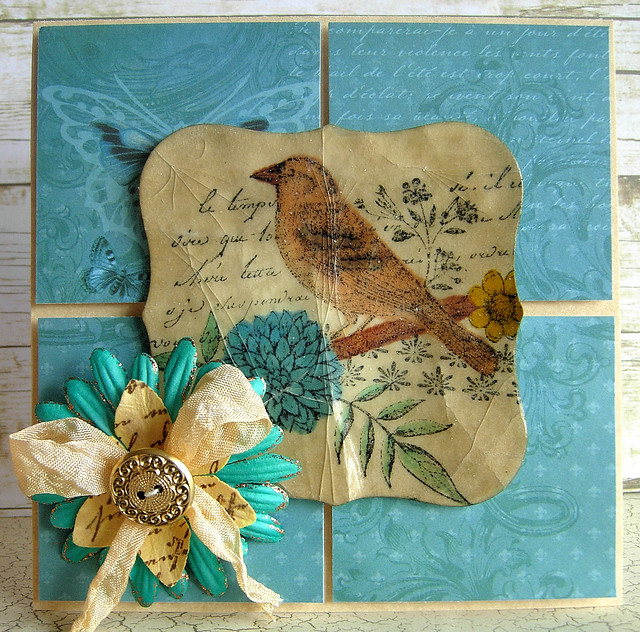
Card A


They were sent to me by these very lovely and talented ladies (in alphabetic order) - Barb, Ivy, Lai-Yoke, Linda, Maureen, Paula, Sally, Sue and Trinh – thank you so much ladies, I can’t tell you how thrilled I was to receive these wonderful Christmas cards from you!
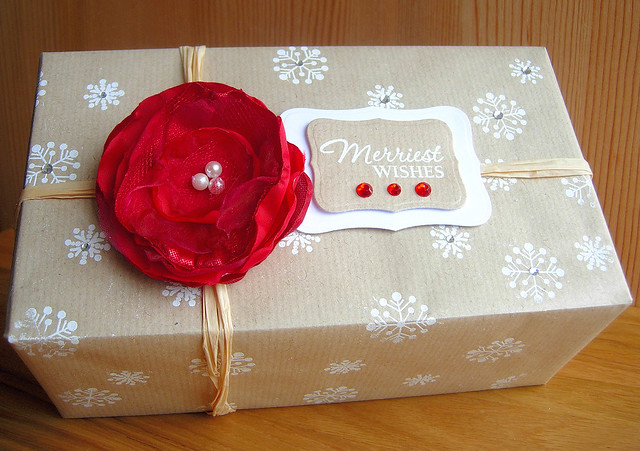
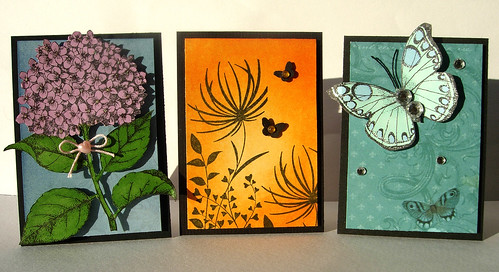
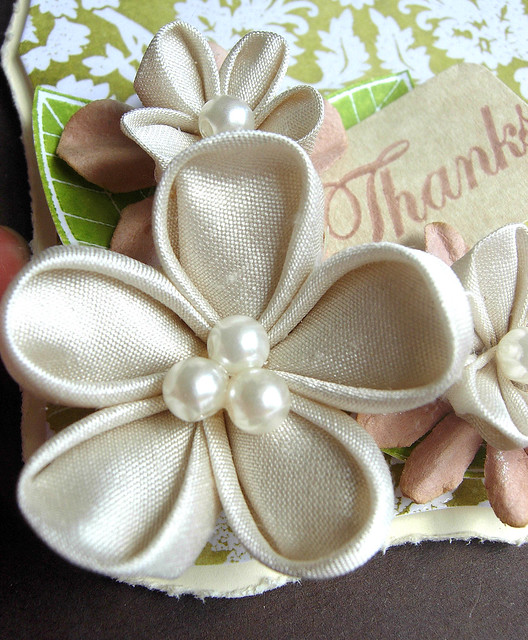
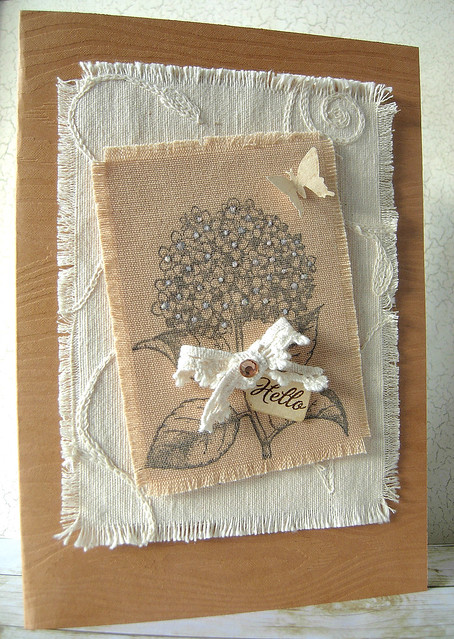
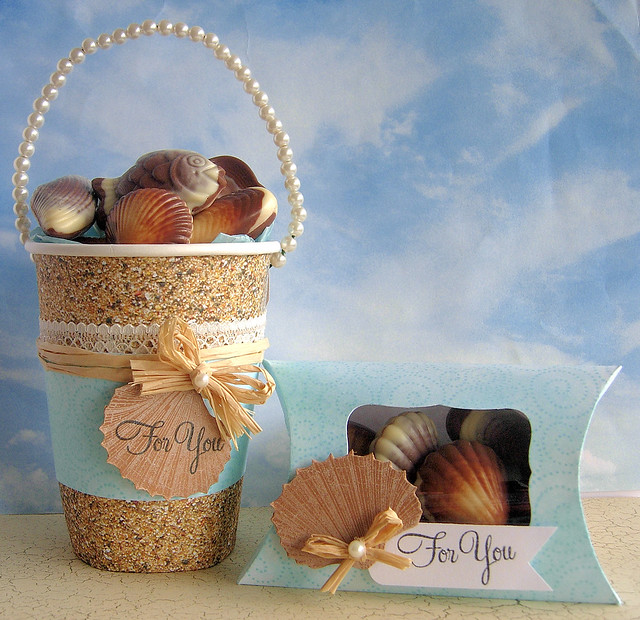
Card B


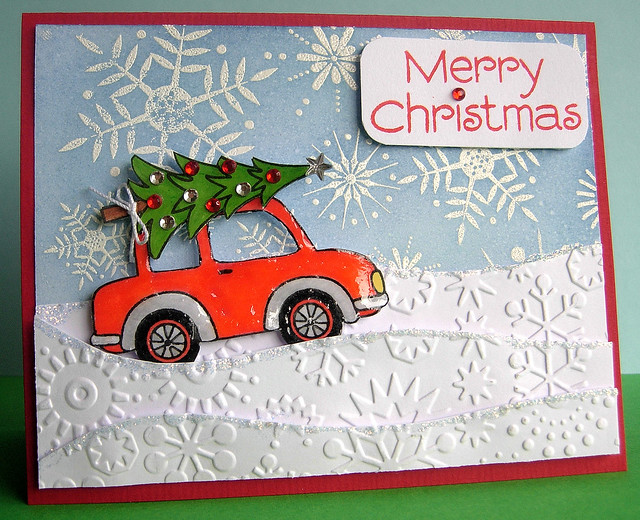
I thought it might be fun to have a little game and giveaway with them. All you have to do is guess who made each card!
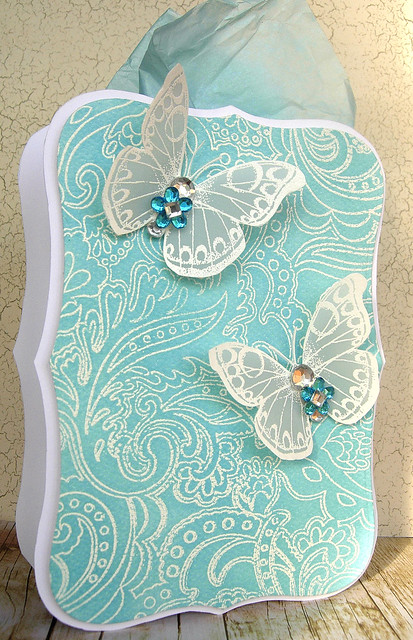
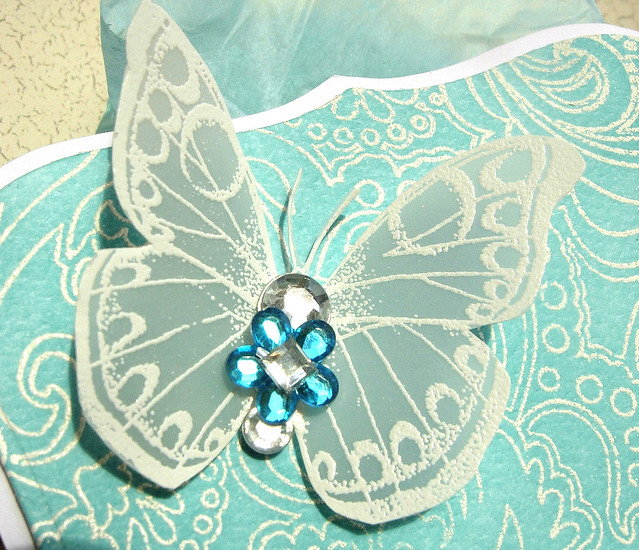
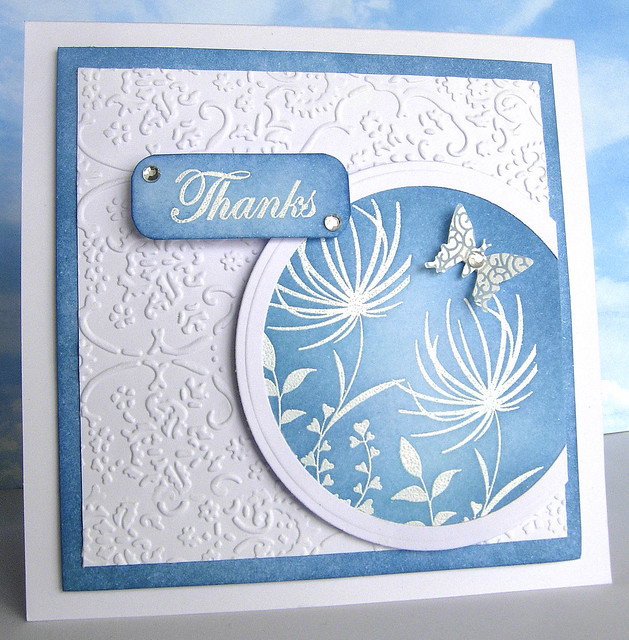
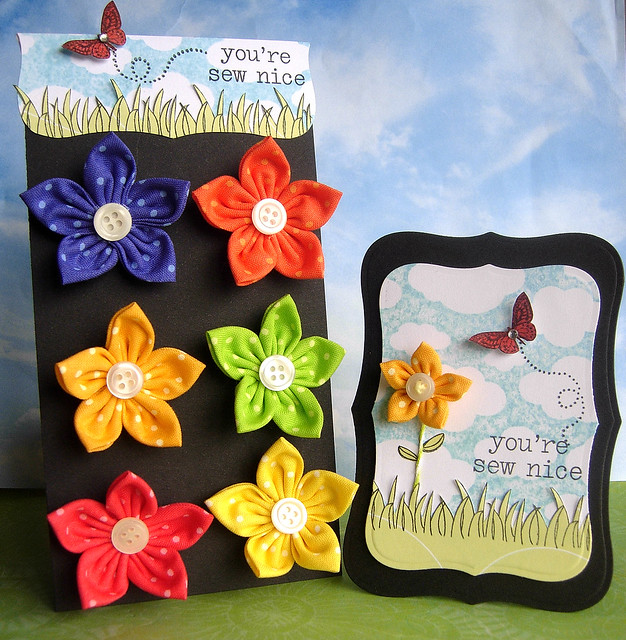
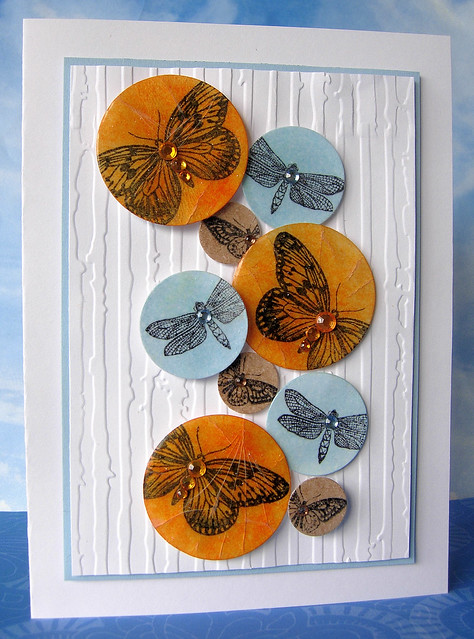
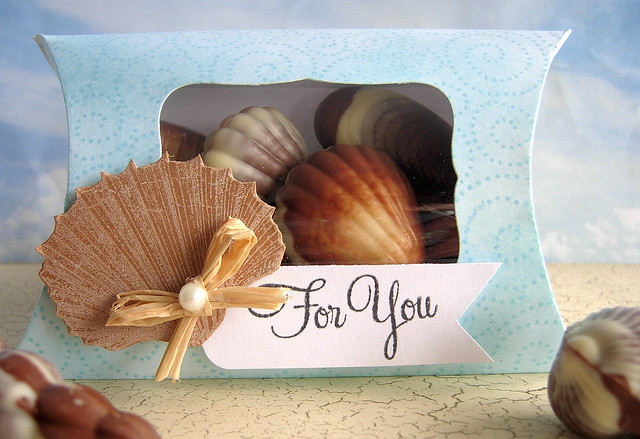
Card C

Just post your guesses in the comment box or email me by 11.59pm PST on Saturday 7th January.
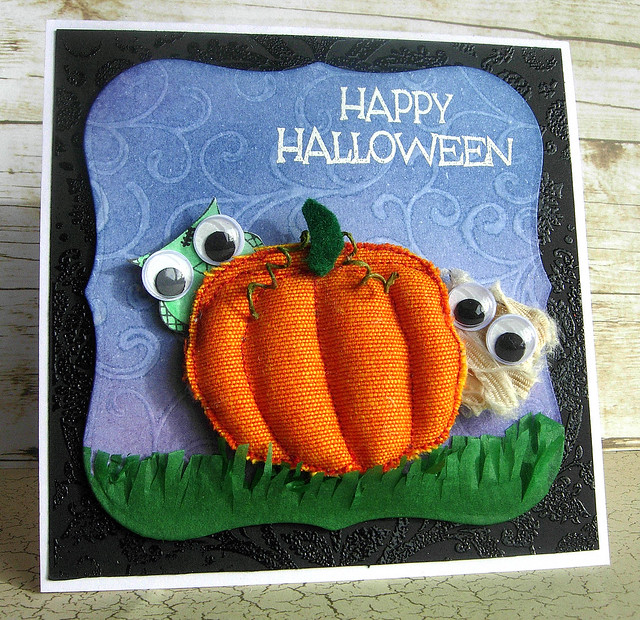
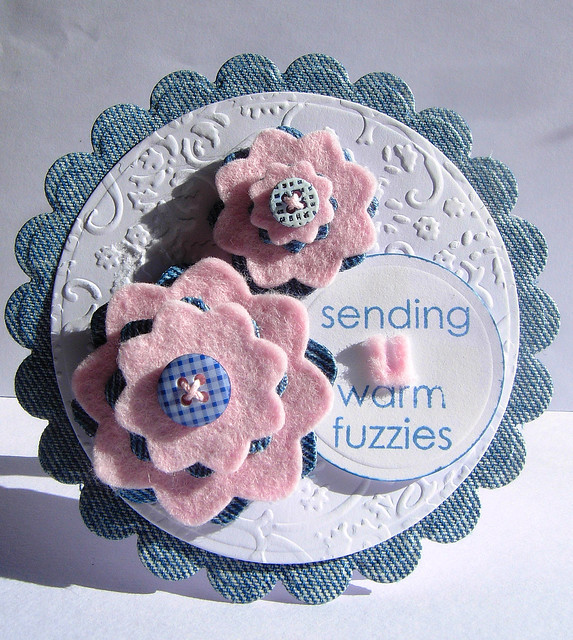
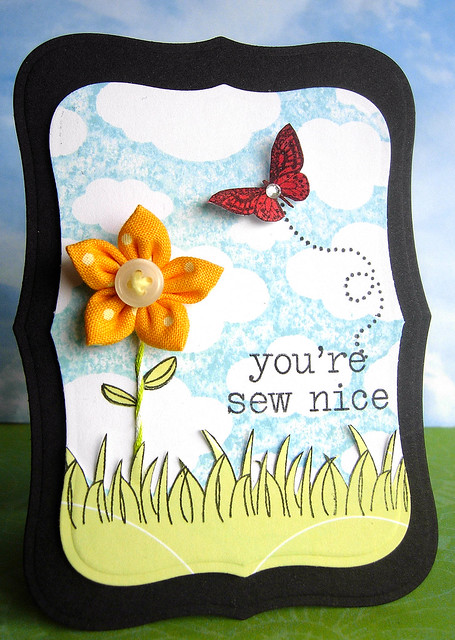
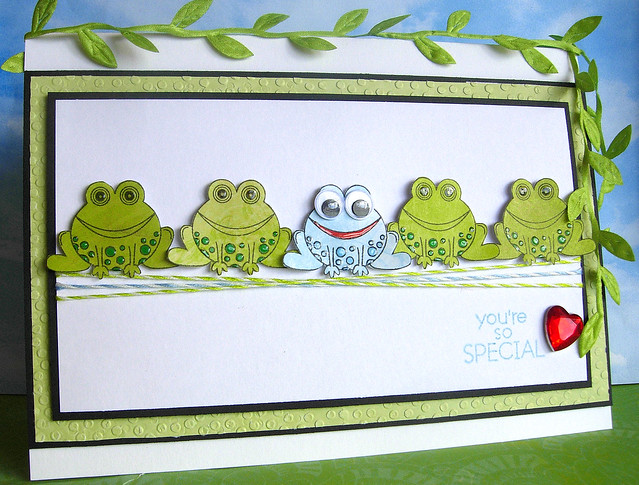
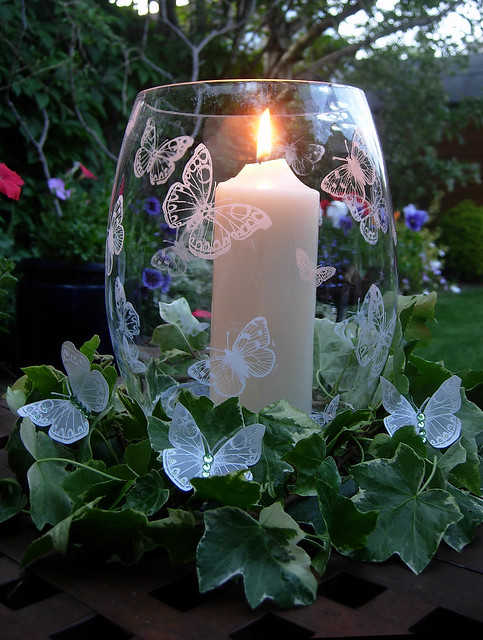
Card D


If you sent me one of these cards, please email me your guesses using my email address, Flickr mail or by using the contact me button on the sidebar, otherwise it might make it too easy for everyone!

Card E


Whoever guesses all or the most correctly will win a little prize. It there's a tie, I'll do a draw. I’ll send a surprise (at the moment it’s a surprise for me too as I’ll only get to my LSS next week to buy the goodies!) and also make a brooch like the one in this post, in whatever colour you'd like.

Card F


So have fun guessing and I’ll post the answers and winner on Sunday 8th December.

Card G


To finish up I just want to say a great big thanks to everyone for visiting over 2011 – I know I haven’t exactly been great for posting, especially in the last few months!

Card H


I really appreciate your visits and the lovely and encouraging comments you have left.

Card I


Hope you all have a fun time celebrating New Year’s Eve and I wish you all of the very best for 2012:):):)

Saturday, December 24, 2011

Happy Christmas!!

I just wanted to pop by and wish you all a very Happy Christmas! Hope you all have a fantastic time with your family, friends and of course furry family members!


Toby Claus

I just have a couple of Christmas cards to share today. Anita is brilliant for organising fun card swaps and I was delighted to take part in the one she put together for Christmas over at the Hero Arts Flickr group. The card below is the one I sent to Greta about 4,500 miles from here. I was in such a hurry to get Greta's card to her that I forgot to take a photo of it, so Greta kindly took one for me - thanks again, Greta!


Stamps (Hero Arts) - Stunning Snowflakes, Decorative Ornament & Very Merry Christmas

In the exchange I received this wonderful card from Ivy! Thanks again Ivy, I love it:)


As well as receiving a gorgeous card in the swap, it has been great getting to know Greta and Ivy a bit more. Now I'm off to watch one of my favourite Christmas films, Home Alone with the lads and I think there might be some hot chocolate, popcorn and chocolate involved - yummy!

Happy Christmas everyone!

Sunday, December 18, 2011

A Gift Card Hidden in the Snow

The current Hero Arts challenge includes a pocket card category, so I thought I’d make a little card for a gift token I’m giving at Christmas.

A Gift Card in the Snow
Stamps (Hero Arts) – Snowy House, Magical Background, Friendly Flags and Very Merry Christmas.

For the front of the card I applied tumbled glass distress ink to white card and using the same ink, stamped it with the magical background. The ground was embossed with snowflakes and some stickles added for a bit of sparkle. I coloured the house with a ProMarker and watercolour pencil, layer it and added stickles for yet more sparkle – lol went a bit sparkle mad on this card! I loved the way Kelly Rasmussen used one of the flags from the Friendly Flag set for Christmas trees on this gorgeous pocket card. So I decided to use a flag with a scallop pattern for my tree here. I layered the tree to add some dimension and added some pink gems and a star to finish. The sentiment is embossed in white.

A Gift Card in the Snow
The inside of the card was made in the same way as the outside, except instead of sticking down the snowdrifts I just attached them to the card on three sides using machine stitching.

A Gift Card in the Snow - inside
My little fella is hoping for it to be as snowy here as on the card on Christmas Eve\Day to make it easier for Santa to get here. Although we've had flurries of snow and a cold snap over the last little while, it's supposed to get warmer during the week. Do you think you will have snow in your neck of the woods for Santa next week??

Thursday, December 15, 2011

Santa Mitten

Yikes it’s been quite some time since I posted, but here I am back again after a fun but busy time for the craft fair.

After a very mild November the weather has changed here with a bit of snow this week and decidedly colder weather. So it’s back to the gloves, hats and scarves again. This reminded me of a pair of mittens I knitted a few years ago for a friend’s little one, which she always called her Santa mittens. Now she’s all grown up (12 1\2!) and I hope she likes her Santa mitten Christmas card.

DSCN9199
Stamps (Hero Arts) – Holly Flourish, Stunning Snowflakes and Small Variety Alphabet.

For the background I applied tumbled glass distress ink to white card and using the same ink stamped the Holly Flourish Background. On another piece of white card I white embossed the snowflakes, applied barn door distress ink and cut out a mitten shape. For the top of the mitten I knitted a piece in single rib pattern using wool left over from making the original mittens - I really shouldn't hoard things! I made a little pocket at the back of the mitten to hold the gift card and attached the ho ho ho sentiment (stamped in barn door distress ink) to it so the gift card could be pulled out.

Hopefully it won't be another month before I post again!

Wednesday, November 16, 2011

A Gift on a Gift

Yesterday I started making some brooches for a craft fair and thought it might be nice to add one to a gift wrapped present, so that the recipient will end up with a gift on a gift.

A Gift on a Gift
Stamps (Hero Arts) – Holiday Dolls (snowflakes) & Very Merry Christmas

To make the gift wrap I randomly embossed the snowflakes on a piece of inexpensive (€1.50 for 20m) parcel paper. After wrapping the box and tying with raffia, I added one of the brooches. The tag has the greeting one side and “to” & “from” on the other side. To finish I just added a scattering of gems to the gift wrap and tag. I’m submitting this project into the current Hero Arts Challenge.

I really enjoy making these flowers and making them has been a great fabric stash buster, though I think I’d need to make hundreds of them to make any real dent in my stash!

Monday, November 14, 2011

Blinged Up Butterflies Gift Box

I can’t believe it’s been over a month since I posted anything so I had to clear the cobwebs off the cobwebs on the blog this morning!

Part of this month’s Hero Arts Challenge is to bling up a project so I went a bit bling crazy on the butterflies for this gift box!

Blinged up Butterflies Gift Box
Hero Arts Stamps (Flower Dot Pattern & Antique Engravings)

To start with I made a small opened topped box – instructions on this post. Then I added white Label 8 die cuts to the front and back of the box. The Flower Dot Pattern was embossed in white on watercolor card and I applied broken china and tumbled glass distress inks.

The butterflies were embossed in white on vellum and blinged up with lots of Hero Arts gems.

Blinged Up Butterfly Gift Box - close up

Recently I’ve been busy with work and the craft fair so hopefully in December I’ll be back to blogging as usual again.

Thursday, October 6, 2011

Loved up Christmas

I can't believe I've actually made my hubby's Christmas card and it's only the 6th of October!

My friend Linda sent me a wonderful package of goodies including the Very Merry Christmas stamp set and embossed images of the Flower Dot Pattern - thanks again, Linda! I've been admiring the Flower Dot Pattern for a while and was delighted to get to play with it. I know the sentiment set is going to get a lot of use in the lead up to Christmas and also throughout the year by using only parts of the sentiments.

Hubby's Christmas Card
Stamps (Hero Arts) - Flower Dot Pattern and Very Merry Christmas

To start with I applied barn door distress ink to the embossed image and sprayed liberally with a water and perfect pearls mix. I love the wonderful shimmery effect of the perfect pearls but just not when I'm trying to take of photo of it! The snowflake is covered with white glitter and the chipboard heart is encrusted with red gems including a couple of heart shaped ones.

Hubby's Christmas Card - close up of the bling and sparkle.

The sentiment is stamped with barn door distress ink. I'm submitting this card into the Lily Pad Cards Bling Challenge , the Textured to Perfection Challenge in the Moxie Fab World and the current Hero Arts Challenge.

DSCN9025

Just showing the shimmer of perfect pearls in this photo.

My blogging is probably going to be a little bit patchy over the next little while (and it already has been for a while!), as at the moment I'm helping with organising a Christmas craft fair and trying to get some bits and pieces made for it - just need a few more hours in the day!

Sunday, October 2, 2011

Happy Christmas from the Snow Drifts

After many weeks of thinking I must get started, I finally made my first Christmas card! For my first card I couldn’t resist playing with this cute car with Christmas tree image that my friend Linda sent me.

Merry Christmas from the Snow Drifts

Stamps (Hero Arts) - Stunning Snowflakes, Car With Tree and Celebrate Everyday

For the background, I white embossed white card with the snowflakes, applied distress inks (broken china & faded jeans) and spritzed lightly with water. The embossed snow drifts are on foam adhesive pads for dimension and are topped with diamond stickles. I coloured the car and tree with ProMarkers & watercolour pencils and coated the car with Glossy Accents. It’s questionable whether anyone would be going through snow drifts with a fully decorated Christmas tree on top of their car, but that’s one of the great things about card making, anything is possible, lol! The sentiment is stamped with barn door distress ink.

I’m submitting the card into Lily Pad Cards Bling Challenge

Thursday, September 29, 2011

Hanging Out on the Lily Pad

I was absolutely delighted when I received an invitation from Deborah and Vicky asking me to be a guest designer over at Lily Pad Cards. I said yes straight away as I love Lily Pad Cards!! There are always fun challenges going on over there and the blog is full of inspirational and fun posts. Lol, my Sunday morning wouldn’t be complete without taking a break to watch Vicky’s latest video with my cuppa and maybe a bickie (edited. Lin, bickie is slang for what we call a biscuit here but you'd call it a cookie) in hand!

So here is one of the cards I made for today using a few of my favourite stamps.

Happy Halloween from Owlenstein and Mumowly

If you’d like to see two more of my cards and the supply list\instructions for the above card, hop over to the Lily Pad where you will find them.

Thanks again Deborah and Vicky for having me over at the Lily Pad, I had a splashing great time there!

Friday, September 9, 2011

ATC swap with Barb

Barb and I decided we'd like to have an ATC swap and sent each other three ATCs. It's only now that I'm uploading the images that I realise how similar our choices were!

ATC swap with Barb - Barb's cards
Above are the absolute beauties I received from Barb. I was so delighted when I opened the package and saw the gorgeous ATCs she had sent me. Thanks again Barb, I really enjoyed our swap and thanks again also for the lovely goodies you sent:)

These are the ATCs I sent to Barb.
ATC swap with Barb
Stamps (Hero Arts) - Hydrangea, Exotic Bloom and Antique Engravings.

On the first one, the background started as white card and I applied distress inks (broken china and faded jeans) and stamped an image in VersaMark (it was a while ago and now I can't remember which image I used!). The hydrangea was coloured with ProMarkers and I just added some diamond stickles to the flower centres. The second one has a background of spiced marmalede distress ink and after stamping the image I added a couple of punched butterflies. On the last one I used a piece of paper from a gorgeous stack of paper which my friend Trinh sent me a while ago. The butterfly was coloured with ProMarkers.

Hope you all have a wonderful weekend:)

Thursday, September 8, 2011

Owl book gift card holder and bookmark

Something my friends and I do more often in the autumn is read. So I made this little gift card holder which has a pocket inside for a book gift card and bookmark.

To start with, I white embossed some white card with the Friend Definition stamp and applied spiced marmalade distress ink. For the woodgrain pieces I applied walnut stain distress ink to white card and stamped the Woodgrain Background using the same ink.

Owl book gift card holder & book mark
Stamps (Hero Arts ) - Friend Definition, Heart Owls, Designer Woodgrain and Flourish Background

The green background started as white card and this was white embossed with the Flourish Background and some shabby shutters distress ink applied. The little owls were coloured with colouring pencils. I just added some googly eyes, leaves (May Arts ribbon) and glossy hearts to finish.

I'm submitting these into this month's Hero Arts Challenge and the Resist Challenge at Lily Pad Cards. Now I'm off to tackle a mountain of ironing which I should have been doing this morning instead of getting inky!

Sunday, September 4, 2011

Shades of Autumn

I really love the glorious range of colours on trees in autumn. This week on the way to work, I've been enjoying the beautiful displays nature has on offer, glowing in the early morning sunlight. So with these colours in mind, I made this card for the current Hero Arts Challenge and the Lily Pad Cards Resist Challenge.

Shades of AutumnStamp - Flower Text (Hero Arts)

To start with I embossed the image in white on white card and applied spiced marmalade and rusty hinge distress inks. I embossed the image again in white on white card and applied distress inks (walnut stain, barn door, mustard seed and shabby shutters) to the flowers and leaves. Now I really have inky multicoloured hands! I pieced the flowers and leaves and added gems and buttons to finish.

Hope you are all having a great weekend:)

Monday, August 29, 2011

The Blues

One of my favourite techniques is resist, so when I saw Lily Pad Cards' Resist Challenge, I just couldn't resist making a card.

The Blues
Stamps (Hero Arts) - Exotic Bloom, Starburst Lace & Messages.

I used the sketch from the Square Sketch Challenge in the Moxie Fab World.


To start with I embossed the Exotic Bloom in white on white card and applied a few of my favourite distress inks - tumbled glass, broken china & faded jeans. The butterfly was punched out of a scrap left over from another project (vellum white embossed with Starburst Lace). I also used the resist technique on the sentiment and added a few gems to the card to finish.


Thursday, August 25, 2011

Sending U Warm Fuzzies

Today I wanted to make a card with a mix of textures and materials. It started out because I was doing a sort out of my kids’ clothes and saved pieces of worn out jeans. Bits and pieces of these will probably end up on a patchwork bag but I took a little bit of denim for the card below.

Sending You Warm Fuzzies
Stamps (Hero Arts) - Everyday Sayings & Envelope Pattern

For the denim card base I adhered a piece of denim to a piece of card and die cut a scallop circle. The flowers were die cut from the denim and some pink felt. A “u” was also die cut from a little scrap of the felt. I had only one button with a check pattern on it, so for the smaller button I used a plain blue button and white embossed the envelope pattern on it. Appropriately enough, the sentiment was stamped using faded jeans distress ink.

I'm submitting the card into the following challenges:

Moxie Fab World - Fabulous Felt Challenge
Lily Pad Cards – Felt\Fabric Challenge
Creative Card Crew - Hand Made Flowers
Paper Creations Ink - Show Us Your Flowers


Monday, August 22, 2011

Thanks with Kanzashi Flowers

Recently I came across this great video on how to make kanzashi flowers. I'd never heard of these before, but thought I'd give them a go.

Thanks with Kanzashi Flowers
Stamps (Hero Arts) - Classic Fabric Design, Antique Engravings, Scattered Leaves and Messages.

The petals of the larger flower start off as 2 inch squares and these are folded over a few times. On the smaller flowers the squares are only one inch, so they proved to be a bit more fiddly, especially with slippy fabric!

Thanks with Kanzashi Flowers

To start with I clear embossed the Classic Fabric Design on white card and applied shabby shutters and forest moss distress inks. The flowers are made from shot silk and I added some pearls to the centres from an old necklace. The butterfly was stamped with a brown chalk ink and I just added some pearls and thread to finish.

I'm submitting the card into a few challenges:

Lily Pad Cards - Fabric\Felt Challenge
Hero Arts - August Challenge
Creative Card Crew - Hand Made Flowers Challenge
Paper Creations Ink - Show Us Your Flowers

Tuesday, August 16, 2011

Fabric Flowers for Friends

I love making fabric flowers and over the weekend spent time making them for some friends. Instead of just putting the flowers in an envelope, I make a holder for them and also a little card with a tiny fabric flower to match.

Flowers for Friends
Stamps (Hero Arts) – Be Happy, Clouds Background, Antique Engravings & Sew Artsy

A tutorial for the fabric flowers can be found here. I applied tumbled glass distress ink to the Clouds Background, lightly spritzed with water and stamped on white card.

DSCN8738

The butterflies were stamped on scraps of white card which had barn door distress ink applied. I used some patterned paper for the grass\leaves and a little piece of baker’s twine for the flower stem.


Just to show the size of the tiny flower on the card.

I'm submitting these projects into the Fabric\Felt Challenge at Lily Pad Cards, Creative Card Crew's Hand Made Flowers Challenge, Paper Creations Ink's Show Us Your Flowers Challenge and also the current Hero Arts Challenge.

Wednesday, August 10, 2011

Happy Birthday Honey

I love the cute little bees from the Be Happy set and decided to use them on my hubby’s birthday card this year.

Happy Birthday Honey
Stamps (Hero Arts) - Be Happy, Clouds, Magical Background, Birthday Messages, Envelope Pattern & Heart Owls

The clouds are stamped with tumbled glass distress ink which had been lightly spritzed with water. All of the hills and the sun came from pieces in my scrap mountain. I coloured the little bees with a ProMarker and colouring pencil. To finish I just added a little diamond stickles to the bees’ wings and Glossy Accents to all the hearts. It’s hard to tell from the photo, but the red background is stamped with the Magical Background using VersaMark.

A quick post today, but right now I have a slice of birthday cake calling me!

Monday, August 8, 2011

Coffee and Cream Hydrangea

Every time I’ve looked at the examples of botanicals at the Fanatical About Botanical Challenge in the Moxie Fab World, I’ve been drawn to all the gorgeous fabrics. So I thought I’d have a rummage through my stash of upholstery fabrics to see if I could use any of them on a card. I had decided on coffee and cream colours and found a couple of fabric pieces that I could use.

Coffee and Cream Hydrangea
Stamps (Hero Arts) – Hydrangea, Old Letter Writing and Every Day Sayings

I stamped the Hydrangea on a piece of frayed fabric, added liquid pearls to the flower centres and once dry added some diamond stickles (unfortunately, I can't seem to catch the sparkle in a photo). The sentiment was stamped on cream card with walnut stain distress ink and some antique linen distress ink was applied around the edges of the tag. I stamped the punched butterfly with the Old Letter Writing using antique linen distress ink and made a little bow from some Hero Arts lace.

Sunday, August 7, 2011

Flying Around in Circles

I wanted to try something a little bit different with the Antique Engravings set for the Fanatical About Botanical Challenge in the Moxie Fab World and the current Hero Arts challenge.

Flying Around in Circles
Stamp (Hero Arts) – Antique Engravings

Because I really enjoyed using the cracked glass technique the other day on the card here, I decided to use it again a little bit on this card. I applied distress ink (spiced marmalade, broken china or walnut stain) to circles of white card, spritzed lightly with water and then stamped with the butterfly or dragonfly.

Flying Around in Circles Closeup

Then I clear embossed the circles. In the case of the orange circles I clear embossed them four more times (really need to find a shop here with UTEE!) and cracked them. To finish I just added some gems. The butterfly\dragonfly circles are added to the card using different heights of adhesive foam pads.

Hope you are all having a brilliant weekend!

Thursday, August 4, 2011

Froggy You're So Special

This is a card I made for a special little boy and I'm submitting it to Lucy’s Lovely Lines Challenge at Lily Pad Cards and the current Hero Arts Challenge.

My original intension was to make a CAS card but I just can’t seem to keep myself from adding bits and pieces! The little frogs are stamped on patterned paper and I added some extra colour to them with ProMarkers as well as glossy accents. For the green background I applied shabby shutter distress ink to some light green card and embossed it.

Froggy You're So Special
Stamps (Hero Arts) – Froggy & It’s a Day for a Cupcake

The sentiment was stamped with broken china distress ink. The twines were a yummy pressie from my friend Linda – thanks again Linda:) I was lucky to have won a fab prize at Lily Pad cards for this card and was amazed with the wonderful box of ribbon I received from May Arts. The green leaf ribbon, which I love, was part of the prize. As for the big red heart I haven’t a clue where it came from – maybe a Christmas cracker or something!

Monday, August 1, 2011

Cracked Bird Collage

I made this card for a couple of challenges, the Fanatical About Botanical Challenge in the Moxie Fab World and the August Challenge at Hero Arts.

I love the look of collage cards but have never tried making one. So I got the Collage Bird stamp a little while ago to ease myself gently into something that isn't my usual style. I wanted an aged look on the Bird Collage image so I stamped it on cream card, coloured with ProMarkers and applied antique linen and pumice stone distress inks. After that I clear embossed the whole image about 5 times and had some fun cracking the embossing for a more distressed look.

Cracked Bird Collage

Stamps (Hero Arts) - Bird Collage & Old Letter Writing

My friend Trinh sent me the gorgeous background paper. Sometimes I find it hard to cut into gorgeous papers (or fabrics) so I just braced myself and went for it here! The flower embellishment is all thanks to my friends – my mum for the button, Sally for the seam binding (applied antique linen distress ink to it), Linda for the cream flower (applied antique linen distress ink and stamped the Old Letter Writing with walnut stain distress ink) and Trinh again for the green flower (applied copper stickles to the edges) – thanks again everyone:)

Wednesday, July 27, 2011

Bucket and Pillow of Shells

It’s been ages since I posted, but now I’m back from holidays and feeling on track again after a bad cold. I wanted to cover two themes in Hero Arts’ July challenge (summertime and parties), the Fanatical About Botanical Challenge in the Moxie Fab World and the Simon Says Stamp and Show Anything Goes Challenge.

Bucket and pillow of shells
Stamps (Hero Arts) - Antique Engravings, Magical Background & Messages

For my kids the ideal summer would include a trip to the beach every day, so when I think of summer, I think of making sandcastles, gathering shells and traisping through the rough grass in the sand dunes. So with this in mind I made these treat containers, which might be suitable for a summer party, and included bits and pieces that I associate with the beach. Then I filled them with chocolate shells - one of my favourites!

Bucket of shells

For the sand bucket, I covered a coffee cup with sand patterned paper. The handle was made with florists wire and pearls from a cheap necklace. I applied tumbled glass distress ink to white card and using the same ink stamped it with the Magical Background. I added a strip of this, some May Arts ribbon, raffia and a stamped shell to the bucket.

Pillow of shells

For the pillow box I applied tumbled glass distress ink to white card, stamped with the magical background using the same ink and die cut a window when the pillow shape was cut out. To finish I just added the shell and raffia.

Now I'm off to have some shells and a cuppa!

Monday, July 4, 2011

Happy Birthday Mark!

This is a card I made for my son Mark who celebrates his birthday today. Happy Birthday, Mark! Since Mark’s birthday is on the 4th of July, I decided to go with a red\white\blue colour combination and some stars and stripes.

Happy Birthday Mark!
Stamps (Hero Arts) - Large Canvas Stripes, Friendly Flags and Clouds Background

To start with I applied barn door distress ink to the stripes stamp and spritzed lightly with water before stamping. The clouds background was stamped in the same way using tumbled glass distress ink. For the blue flags, I applied broken china and faded jeans distress inks to white card and embossed the flags in white. I used a scrap of the stamped canvas stripes for the birthday flag.

Happy 4th of July to all you who celebrate it too:)

Sunday, July 3, 2011

Aagh!

Now that we’re enjoying warm summer evenings, it’s lovely being out in the garden quite late. I love having candles outside so decided to stamp a vase to hold a large candle.

Aagh!
Stamp (Hero Arts) – Antique Engravings

Of course when I was doing this I didn’t take into account having to photograph it! I had so many problems with reflections, trying to capture the sparkle of glitter and also because the butterflies are stamped all the way around the vase, in the photos it looks like some of the images overlap – aagh! The photos aren’t great but I gave up on getting good ones!

Aagh!

Using white StazOn, I stamped three different sized butterflies from the Antique Engraving set on the vase. We have ivy on parts of the garden walls so there is always a plentiful supply to make ivy rings. So I white embossed a number of butterflies on vellum, added diamond stickles, gems and attached them to the ivy ring.

Batik Summer Butterflies

This month part of the Hero Arts challenge is summertime, so I decided to go with summery colours and butterflies for this card.

Summer Butterflies
Stamps (Hero Arts) - Butterfly Wallpaper, Antique Engravings & Messages

I love the gorgeous Butterfly Wallpaper stamp that Linda kindly sent me – thanks again, Linda! I wanted to try the batik technique I had seen Tami Hartley and Lisa Spangler use on their gorgeous cards here and here. Firstly I embossed the image in white on white card and then applied tumbled glass, broken china and faded jeans distress inks. Then I covered the embossed image with a piece of vellum (usually a piece of copy paper is used) and ironed it. By ironing the image, the embossing is transferred onto the vellum and the original piece of card has a batik look.


Using the vellum was just a little experiment - I had my fingers crossed it wouldn’t melt or get stuck to the embossed image! Well it worked and now I have a piece of vellum with the butterflies image on it which I’ll be able to use on another project. The big butterfly was coloured with a ProMarker and I just added some pearls and black thread to finish. The sentiment was stamped with tumbled glass distress ink.
Related Posts with Thumbnails