Showing posts with label Very Merry Christmas. Show all posts

Monday, August 15, 2016

Inked Embossing Folder Challenge

It's time to set another Christmas card challenge for my friend Linda. This time the challenge is to ink an embossing folder.

This week I needed to make a quick card so inked up the snowflake embossing folder (thanks again, Linda!) with dusty concord and milled lavender distress inks. After spritzing some water on the ink I embossed a panel of white card. Once the ink had dried I added it to the card base with foam pads and added some gems. The sentiment was stamped in dusty concord distress ink.


Embossing folder - Snowflake Set (Hero Arts)
Stamp - Very Merry Christmas (Hero Arts)


There are little splodges of ink on the snowflake which I kind of like as it give the snowflake a bit of a distressed look. On my first attempt at making the panel I definitely went way overboard spritzing water on the ink on the embossing folder which meant the ink ran everywhere, including on the snowflake, when I passed the folder through the Big Shot. Anyway I ended up with a panel I can use on another card.


You should pop over to Linda's blog where you'll find a fun Christmas card challenge again this week.

Sunday, July 24, 2016

Linda's One Layer Challenge

Earlier in the week my friend Linda set a challenge to make a one layer Christmas card. I rarely make one layer cards but it was fun, and I have to admit a little challenging, to give it a go. Midweek I was in the process of making a card and as there was a lot of colouring left to do on it I brought it into work on Friday to finish it at lunchtime. Then what did I do - left it in work by mistake! So this morning I started again from scratch using the same images but made a less "busy" card which I think I prefer to the one that's still sitting in my drawer in work.

I started by heat embossing the sentiment in gold and then stamped a mix of images on part of the card. After that I used Promarkers to colour the flowers and pine cones. I wish I was brave enough to try a bit of splattering but after dropping an inky block and messing up what was my first attempt at this morning's card, I left the card as it was.


Stamps (Hero Arts) - Color Layering Dimensional Bird, Very Merry Christmas and Build a Wreath by Lia

To finish I just added diamond stickles to the flower centres - hopefully it's okay to do that on one layer cards!


Next up was the matching tag which I think I'll redo as I wrinkled it a bit when trying to flatten it after it got a little warped from heat embossing. Lol it has been a day for stampy mishaps so I think I'll try my hand at something else today!


Stamps (Hero Arts) - Color Layering Dimensional Bird, Very Merry Christmas and Build a Wreath by Lia


Wednesday, July 13, 2016

Linda's Snowflakes and Dry Embossing Challenge

As I'm off work for a few days I was able to get straight into making a Christmas card for the challenge set yesterday by my friend Linda - a card with snowflakes and dry embossing.

I started by applying distress inks (faded jeans, broken china & tumbled glass) to a piece of white card, spritzed it with water and then embossed it using a gorgeous folder that Linda gave me when we met on holidays recently - thanks again, Linda! The pretty snowflake dies Kristina Werner designed for Simon Says Stamp are my favourites so I just had to add one of them to my card too.


Embossing folder - Snowflake Scroll (Darice)
Die - Kate Snowflake (Simon Says Stamp)
Stamp - Very Merry Christmas (Hero Arts)


The snowflake was die cut from white card and a layer of diamond stickles and a gem applied for some sparkle.


Next up I made a matching gift tag with pretty much the same supplies.


Dies - Kate Snowflake (Simon Says Stamp) & Lacey Squares (Spellbinders)

It's great to have another card and tag to put into my bundle for Christmas. Linda, thanks again for the fun challenge and helping me be better prepared for Christmas this year!

Monday, July 4, 2016

Out of Season Quilts

I haven't posted in quite a while as a lot of my spare time over the past few months was spent making table decorations and tags for favours for a charity fund raiser which was held last month. We also had a lovely holiday in Florida in June and I enjoyed spending some of it with my friend Linda and also got to meet up with my friend Kelli who I worked with years ago when I lived in Florida. I haven't seen Kelli in 22 years but it felt like only yesterday when it came to chatting with each other. The whole family enjoyed the holiday and I have to admit a lot of crafty shopping took place:) My goodness the crafty shops were amazing, so big and so well stocked - I must have been grinning from ear to ear and didn't know where to look first! In all the excitement I forgot to take photos inside the shops but we went to JoAnn, Michaels and a wonderful shop in Lakeland called Violette's Scrapbook Store with room after room of tempting goodies. They had a fantastic room for classes and I saw some brilliant projects on display for upcoming classes. It really is a must place to visit if you are in the area, just wish I lived a bit nearer to it!

Anyway enough about shopping, now onto making! My friend Linda is an avid participant in the Merry Monday Challenges and creates a card for nearly every one of the challenges set each week throughout the year. It's such a great way of building up a stash of Christmas cards and I keep meaning to join in on the fun, but of course nearly every week time just runs away on me too quickly. The Merry Makers are taking a well earned break during July and August so in those months Linda and I are going to set weekly challenges for each other so she keeps up with making her Christmas cards and I get a start on making mine. If you would like to join in with Linda and me for either or both of the challenges set, we'd love to see your cards - just leave a link in the comments section on Linda's blog or here so we can find your card/s.

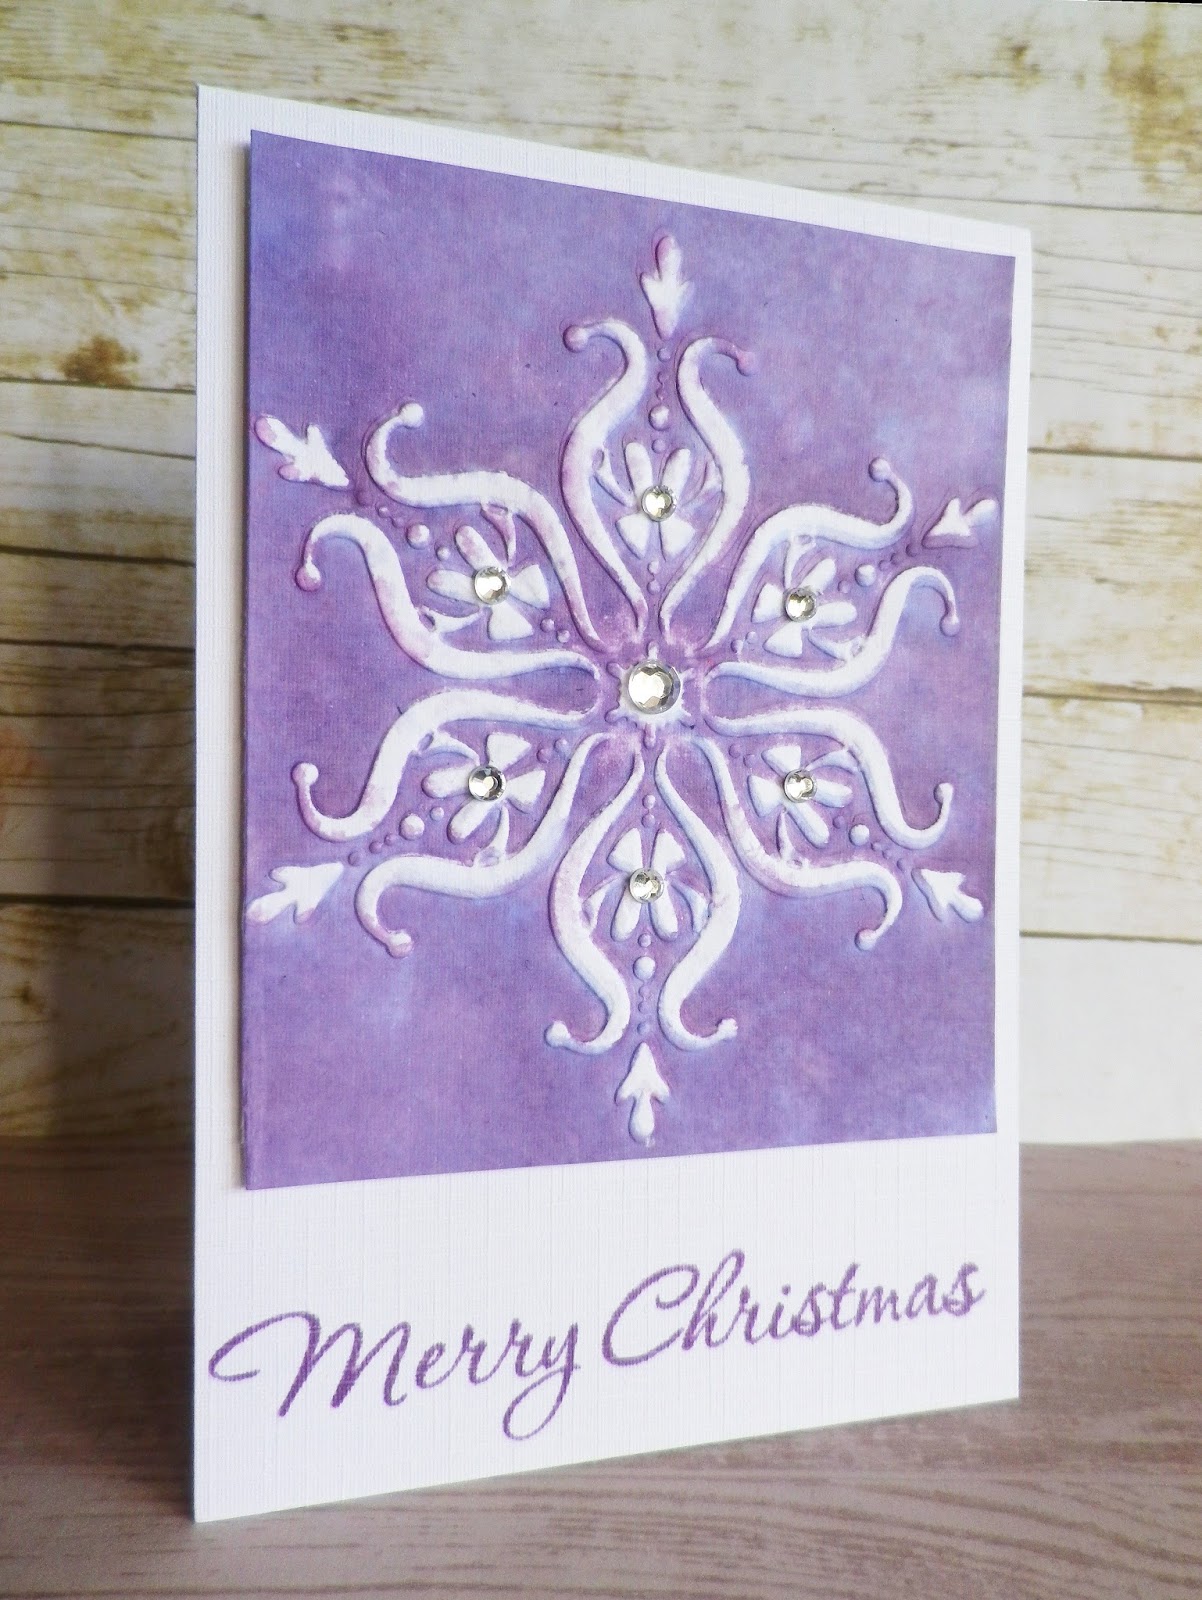
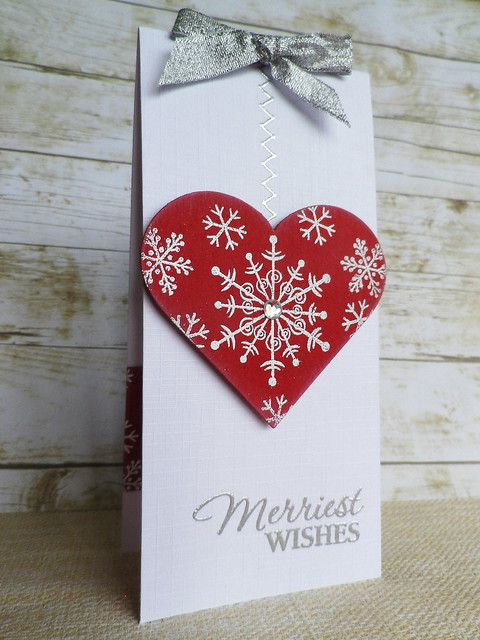
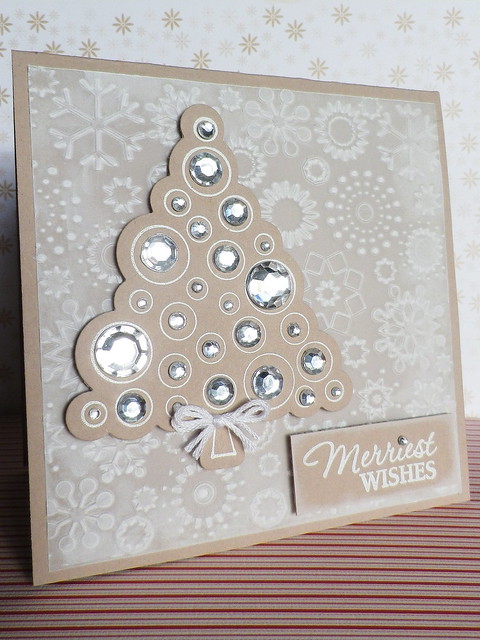
So Linda, it's challenge time and the theme I picked for this week is "A Cosy Quilt for Christmas". Not only do I absolutely love quilts but Linda gave me an amazing package of goodies in Florida and included MFT quilt dies that I absolutely love and can't stop using - thanks again, Linda!


Dies - Die-namics Diagonal Quilt Square Cover-Up (My Favorite Things) & Mini Snowflakes (Lawn Fawn)
Stamp - Very Merry Christmas (Hero Arts)


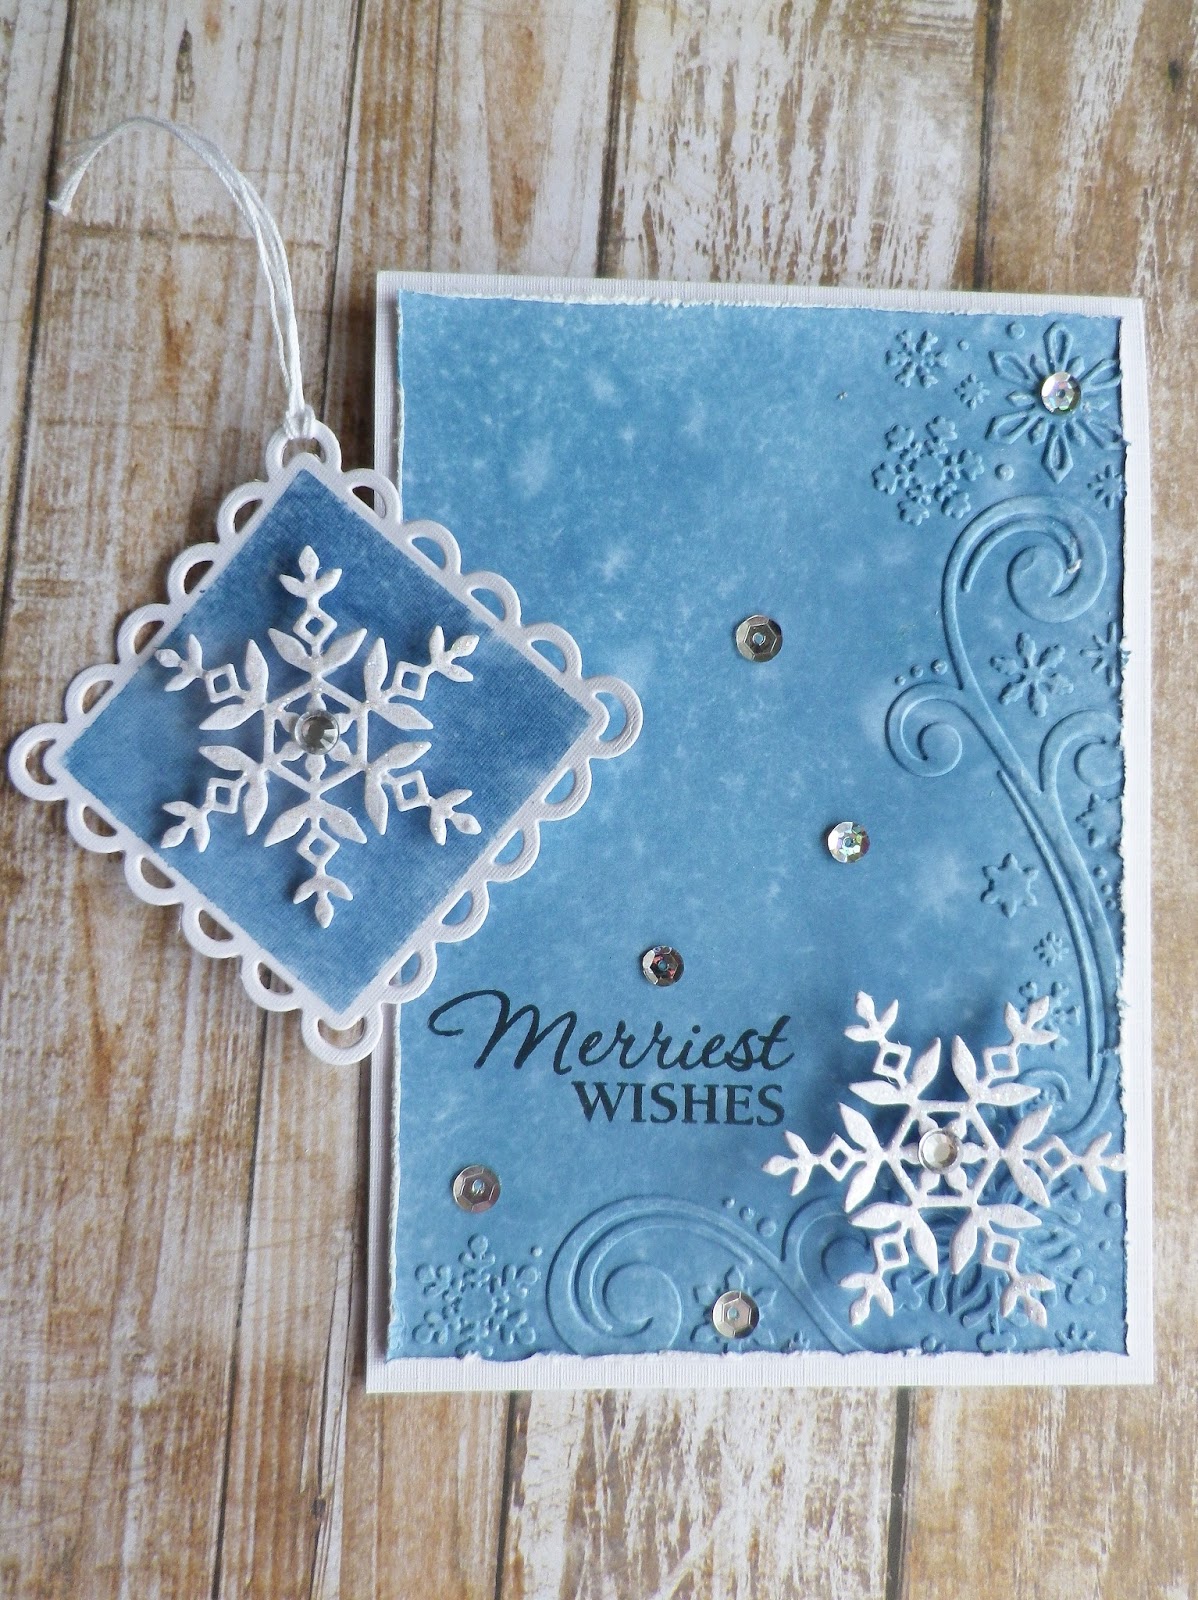
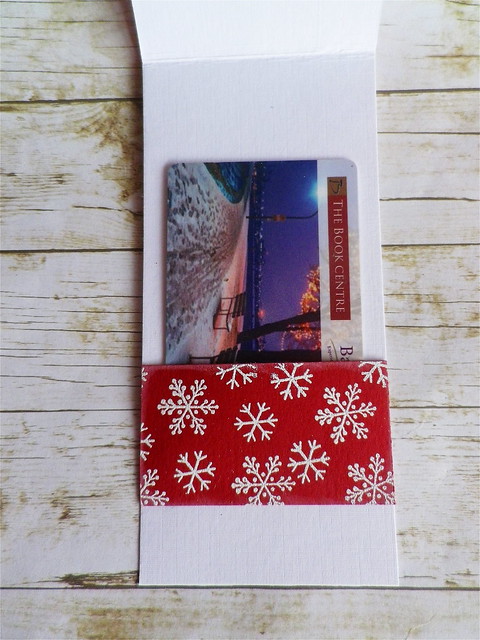
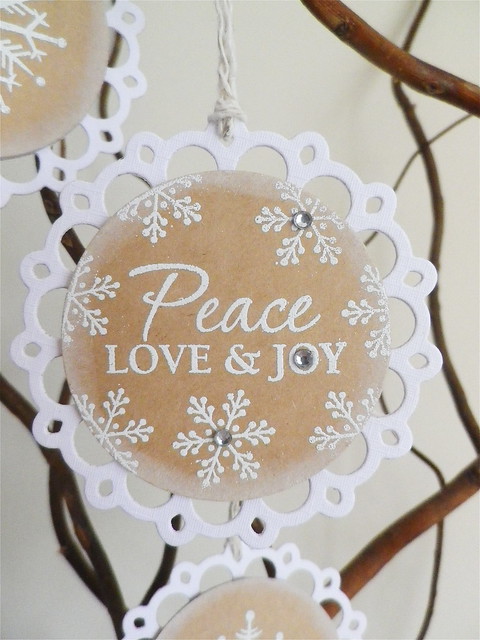
As Christmas draws closer I always seem to be in a rush to make tags as well as cards so for our weekly summer challenges I'm going to try to make a tag to match the challenge card. Lol I'll probably be doing well to make two Christmas cards each week so we'll see how it goes with the tags:)


Dies - Quilt Cuts 2 (WPlus9), Die-namics Pierced Rectangle Frames (My Favorite Things) & Mini Snowflakes (Lawn Fawn)
Stamp - Woodland Wreaths (Wplus9)


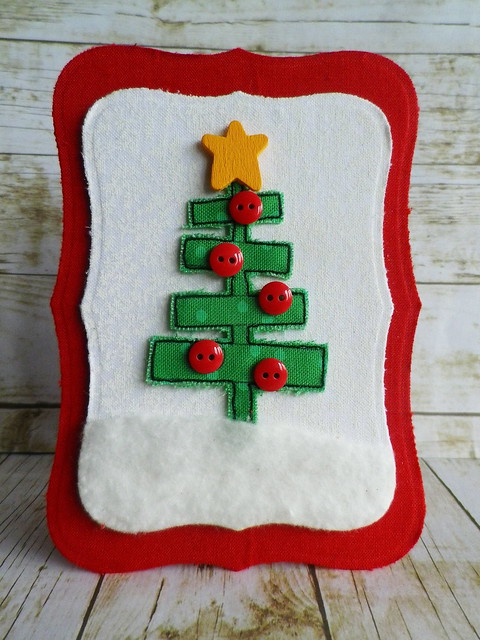
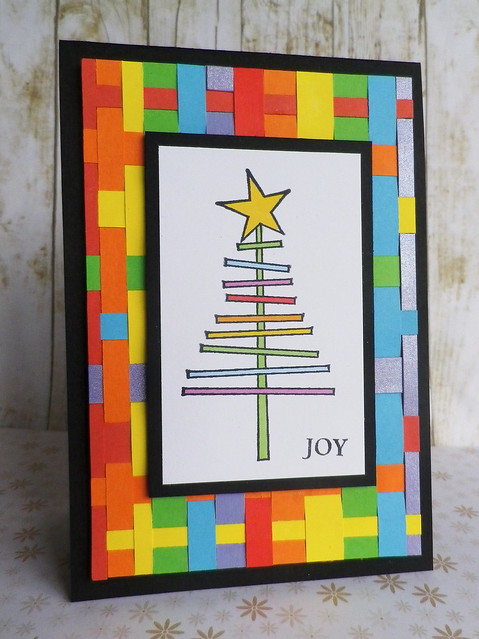
While I'm showing you a Christmas card and tag in July, why not a St Patrick's Day card in July too! This is the card I sent to Linda way back in March and never got around to blogging.


Dies - Quilt Cuts 2 (WPlus9) & Shamrock (Impression Obsession)
Stamp - Celebrate Everyday (Hero Arts)


I'm delighted to see Linda has posted her challenge, you can find it here over on her blog. It's a great one and I can't wait to get started on it!

Happy 4th of July to all those who are celebrating! We have our own celebrations going on here with our older son's birthday today:)

Sunday, November 15, 2015

Peace, Love, Joy and Mistletoe

I like trying to find different uses for my crafty supplies and when my good friend Linda sent me some lovely die cuts of Spring Branch by Hero Arts, I thought they would be perfect for making a little bunch of mistletoe. Unfortunately it's another dull and cloudy day here today so the photo isn't great.


Stamp (Hero Arts) - Very Merry Christmas
Dies (Hero Arts) - Ribbon Cutting Set by Lia & Spring Branch
Embossing Folder (Darice) - Snowflake Trim


Yet again I fell back on my old reliable Snowflake Trim embossing folder for the background panel. Once the panel was dry embossed, I embossed the sentiment in silver and adhered the panel to the cardbase with foam pads. Then I added some pearls to the branches and again used foam pads to adhere the mistletoe to the card. To finish I die cut a bow from silver glitter paper.

I'm submitting this card into Simon Says Stamps Create Something Beginning With The Letter ‘N’ Challenge. The letter "n" on this card is for the new Hero Arts Ribbon Cutting set by Lia and also nearby kisses with the sprigs of mistletoe:)


Thursday, October 29, 2015

Merry Christmoose

Yesterday I received some very happy mail thanks to the generosity of my favourite company - Hero Arts. Thanks a million Hero Arts:) I’m so glad I’m off work for most of this week so I can dive in and get inky! I started by making some items for a Scramble I’m hosting in the Hero Arts Flickr group on Saturday, but since the theme is a surprise I can’t post them just yet.

Anyway next up I wanted to use Christmas lights from the new Sparkle Borders set. I always like to make some cute Christmas cards and this time decided to have the funny moose from the Missing You set decorated or decorating for Christmas.


Stamps (Hero Arts) – Sparkle Borders, Missing You, Very Merry Christmas, Christmas Reindeer (snowflake), Polar Set by Lia (snowflake) and Fancy Cut Christmas (snowflake)


After die cutting a circle from a panel of kraft card, I embossed the panel and left it aside. For the background I inked a piece of white card with tumbled glass and salty ocean distress inks. After spritzing it with water and allowing time to dry, I stamped a mix of snowflakes in faded jeans distress ink . I adhered some snow banks onto the panel. These were made by tearing white card and distressing the edges with a scissors. I stamped the moose on white card and drew a line of string for my lights. The smallest light image from the Sparkle Borders set was stamped along the string. After cutting out the moose and lights image I coloured it with Promarkers and added diamond stickles and glossy accents to the lights.


The sentiment was made by combining sentiments from the Very Merry Christmas and Missing You sets.

I’m submitting this card into Merry Monday’s Christmas Lights and Glitter Challenge, Simon Says Stamps’ Anything Goes Challenge and Hero Arts’ Holiday Card Making Challenge.

Sunday, December 1, 2013

Fabric Card & Pastel Christmas Tree Set

One of my favourite Christmas stamps from this year is Shari's Tree No. 3. When I first saw it it made me think of a Christmas tree that could be appliquéd onto a quilt. So out came the fabrics and I ended up using them for the whole card front, with some card used as backing for a bit of firmness.

Fabric Christmas card
Stamp (Hero Arts) - Shari's Tree No. 3

I stamped the tree on fabric, added another layer of fabric at the back, and stitched the outline using a machine. After cutting out the tree I gently frayed the edges back to the stitching and added some buttons. For the background I used a white fabric with a white design and the "snow" is a piece of batting. A piece of red fabric was used for the card front. After die cutting both of these pieces I also gently frayed them around the edges to give a fuzzy look.

As I had the tree stamp out, I decided to go ahead and make another card by stamping on various pieces of pastel coloured card. In the end as I had to stamp four trees anyway, I made a set of cards changing the sentiments on each.

Pastel Christmas Trees
Stamps (Hero Arts) - Shari's Tree No. 3, Very Merry Christmas & Special Delivery

I die cut the kraft panel pieces, stamped the tree on them and then added some stitching.

Merry Pastel Christmas Tree

After that I embossed the sentiments and lightly applied white ink around the edges.

IMGP2176

I paper pieced the trunks and popped the branches up on foam pads for dimension.

IMGP2173

For the background I embossed snowflake panels.

IMGP2172

I can't believe I made five cards today - must be a record for me, lol! I'm submitting these cards into the current Hero Arts Challenge (A Few of my Favourite Things category as I love stamping on fabric and also love paper piecing) as well as Simon Says Stamp's Anything Goes Challenge.

Friday, November 29, 2013

Snowy Hearts

I wanted to incorporate hearts into my hubby's Christmas card and needless to say I was back to the snowflakes again too!

Snowflakes and Hearts
Stamps (Hero Arts) - Designer Snowflakes, Very Merry Christmas & Christmas Reindeer

I die cut a heart from a square of red card and embossed lots of snowflakes all over the panel. Then I applied some white ink to the edges and did a bit of distressing. After dry embossing a panel of white card, I placed it behind the heart window and then embossed the sentiment on another die cut heart. All of the pieces are popped up on foam pads and to finish I just added some gems.

As I had bits and pieces left over from making the card, I decided to use them to make a small card to act as a gift card holder.

Snowy Heart Card & Gift Card Holder
Stamps (Hero Arts) - Designer Snowflakes, Very Merry Christmas, Christmas Reindeer & Sew Artsy)

Again I just embossed snowflakes on the large heart left over from making the first card. This time I added a bit of silver embossing on the sentiment and stitched line holding the heart ornament. To finish I added a gem, a bow and a little pocket on the inside to hold the gift card.

Snowy Heart Card - inside pocket for gift card

I'm submitting these cards into Simons Says Stamp Anything Goes Challenge and the current Hero Arts challenge (A Few of My Favourite Things category, as I love stamping and embossing and also love using individual stamps to make a background).

Tonight we'll be watching one of our favourite programmes that really signals the start of the Christmas season for us here - The Late Late Toy Show . So we'll be setting down with a big bowl of popcorn, hot chocolate and will make some s'mores by the fire - ah bliss! Hope your weekend gets off to a great start too:)


Saturday, November 23, 2013

Prancing Through the Snow

One of my favourite cute Christmas stamp sets is Hero Arts’ Christmas Reindeer set - I love the sweet reindeer in their adorable little jumpers (sweaters) so much. I seem to be using kraft card over and over again on my Christmas bits and pieces so I took a big, deep breath and stepped away from it for this card!

IMGP1986

Stamps (Hero Arts) – Christmas Reindeer, Very Merry Christmas and Designer Snowflakes.

I stamped the reindeer a number of times and after cutting them out coloured them with ProMarkers. The heads and jumpers are on foam pads for a little dimension. Maureen sent me the pretty glitter domes that I used for the reindeer’s noses – thanks again, Maureen:) I save these pretties for any reindeer cards I make. Our sons were looking at the card after I made it, one said I should have only one Rudolph on my card but the other one said I could use artistic licence - so that’s my excuse and I’m sticking to it!

To make the background I put a mix of distress inks (broken china, tumbled glass and faded jeans) on a piece of tinfoil and spritzed with a water and perfect pearls mix. Then I pressed a panel of watercolour card over the ink and kept repeating the process until I was happy with the background. As usual, I'm finding it hard to capture the shimmer in a photo but here's a little glimpse of it in this photo.


Once the panel was dry, I stamped snowflakes using broken china and faded jeans distress ink. To finish I added some machine stitching and the sentiment stamped in barn door distress ink.

I’m submitting this card into the current Hero Arts Challenge, A Few of My Favourite Things category as I enjoying creating a scene with stamping.

Sunday, November 17, 2013

Colourful Christmas

I love Hero Arts' cute New England Winter stamp and this time wanted to make a colourful winter scene with it.

IMGP1915

Stamps (Hero Arts) - New England Winter, Very Merry Christmas, Designer Snowflakes & Christmas Reindeer

I started by embossing snowflakes on kraft and inked the edges with white ink. Then I added some snow banks on foam pads. The little houses were stamped in various colours using either markers or distress ink. After cutting them out and adding them to the scene I added loads of stickles and some rhinestones for some sparkle.

IMGP1928

I wish I could capture in a photo all of the shimmer from the stickles. I'm submitting this card into the current Hero Arts Challenge (A Few of My Favourite Things category as I used a couple of my favourite stamping techniques - embossing and creating a scene with stamps).

Thursday, November 14, 2013

Snowflake Gift Tags

After making my last card I still had kraft card on my table, so when I wanted to make some snowflake gift tags this morning, I went with a kraft and white colour combination. I love the very pretty snowflakes from Hero Arts' Designer Snowflakes set and used these on all of the tags.

IMGP1855

Stamps (Hero Arts) - Designer Snowflakes & Very Merry Christmas

I started by die cutting the tag bases and added some string. Then I die cut some kraft card, embossed the snowflakes & sentiment and added gems. To try to add an even more snowy look to the tags I inked the edges with white ink. The snowflake pieces were added to the bases using foam pads. These tags are so easy and simple to make and put together, I think I'll make a batch of them over the weekend.

IMGP1847

I'm submitting these tags into the current Hero Arts challenge (A Few of my Favourite Things category, as I used one of my favourite stamping techniques - stamping and embossing) as well as the Die Cut Divas' Let's Celebrate challenge.

Saturday, November 2, 2013

Merriest Wishes

Now that Halloween is over, it's full steam ahead with making Christmas cards. I'm trying to come up with some ideas for quick cards to make for Christmas so I can get a number of cards made in any one sitting, or I should say standing, as I always seem to stand when making cards!

I pulled out the Merry Christmas Tree stamp and die set I got last year to make a card that is very quick and easy to put together. This card is for a relative who loves muted colours and lots of bling, so I went a bit wild on the shimmery gems! I'll probably make a couple more cards like this using different colour combinations.

IMGP1781

Stamps & die (Hero Arts) - Merry Christmas Tree & Very Merry Christmas

I started by embossing a square of vellum using a snowflake folder and applied some white ink here and there. Then I embossed the Christmas tree, die cut it and added lots of gems and a bow. The sentiment was also embossed and I lightly inked the edges of the sentiment piece and added a little gem.

I'm submitting this card into the current Hero Arts Challenge (A Few of my Favourite Things category) as I used embossing which is one of my favourite stamping techniques. Also I'm submitting it into the Die Cut Divas Let's Celebrate Challenge and Simon Says Stamp Anything Goes Challenge.

Someone here is already in their relaxed weekend mode!


Hope you have a relaxing, fun and inky weekend!

Sunday, September 15, 2013

Happy Mail and Trio of Christmas Cards

When I came home from work one evening this week, I was so excited to find a package waiting for me from my good friend Linda. Included in the package was this wonderful card Linda had made, it's so pretty and soft looking – I love it. Linda always seems to know exactly what I love and this time was no exception – look at this brilliant array of goodies. Thanks again for everything, Linda:)

Happy mail

Well talk about spoiled for choice and not knowing where to start! I’ve been having great fun playing with the Brush Strokes set but the first items I completed were three Christmas cards using Shari Carroll’s fab Christmas Trees from Hero Arts. I wanted to make three cards that are quite different to each other and also wanted to reflect something from the images on the rest of my card. As I was inspired by the Hero Arts blog I’m submitting these cards into the current Hero Arts Challenge.

The first card was inspired by the design and traditional colour scheme in this gorgeous card by Jennifer McGuire. As the Christmas tree made me think of an appliquéd pattern, I added lots of faux stitching after colouring the tree. Because of the design of the tree I tilted the background stamping.

IMGP1622

Stamps (Hero Arts) – Shari’s Tree No 3, Very Merry Christmas & Precious Baby Boy

For the second card I went with non traditional colours and lots of embellishing. I was inspired by the repeating of the circular shapes, rounded corners and added bling in this wonderful card by Kelly Rasmussen.

IMGP1614

Stamps (Hero Arts) – Shari’s Tree No. 2 & Very Merry Christmas


The third card was inspired by the thin branches on the Christmas tree and the colours and lines in Tami Hartley’s fab tag here. After colouring a rainbow Christmas tree, I wove thin strips of card into a colourful background to tie in with the tree and “Joy” sentiment.

IMGP1616

Stamps (Hero Arts) – Shari’s Tree No. 1 & Very Merry Christmas

I’m planning on making a card organiser today – thanks for the great idea, Linda! So hopefully as the weeks go by I’ll be adding more and more Christmas cards to it and won’t be dashing around at the last minute, as I usually do, making cards!


Tuesday, August 13, 2013

Hexagon Christmas Tree

I know, I know, here I go again, it's August and I have another post about Christmas! But Volume 8 of Holiday Cards and More, my favourite magazine, was published last week and I'm feeling all Christmassy and eager to make Christmas projects because of all the wonderful inspiration contained in the magazine.


I'm still pinching myself that I have three project in the magazine - a card, a gift tag and this home décor item


Stamps - Happy Hexagons (Papertrey Ink) & Very Merry Christmas (Hero Arts)
Die set - Geometric Shapes (Hero Arts)


A while ago my good friend Trinh surprised me with the gorgeous Happy Hexagons set from Papertrey Ink (thanks again, Trinh!) and this was the first project I made using them. Along with the hexagons I just used a couple of my favourite things (distress inks and stitching) to make this.


Mmm I wonder how many days do I have to wait before I can put up and decorate our Christmas tree!!

Wednesday, February 6, 2013

Owl Love You

I wanted to try to make a masculine Valentine, so instead of the usual pinks and reds, went with kraft, black and white with some touches of red.

Owl Love

To make the base, I embossed the Looped Circle Pattern (I'm officially addicted to that stamp!!) on the back and front of the card and cut out some of the stamped areas to make a scalloped outline. Then keeping it fairly plain and simple I just embossed the branch and owls. I coloured the leaves with a gel pen and added little dots of white to the flower centres. The hearts were also embossed and covered in a layer of Glossy Accents for some extra sheen.

I'm submitting this card into the current Hero Arts Challenge and Simon Says Stamp Have a Heart Challenge

Sunday, December 9, 2012

Shimmery Snowflake Bauble

When I came across the sumptuous Tuesday Trigger over at the Moxie Fab World I wanted to play straight away. So I took a little break from putting up the last of the Christmas decorations to make this card.

Shimmery Snowflake

Stamp (Hero Arts) - Very Merry Christmas

To start with I embossed the sentiment in silver on a panel of cream linen texture card and added the stitching. Then I die cut the snowflake and covered it with lots of white glitter. To make the sparkly centre, I just die cut a circle of cream card and encrusted it with beads, gems and pearls.


I took inspiration from a number of elements in the photo above - the baubles, the colours, the snowflakes, the elegant shape of the tray and of course the sparkle and shine. Also I couldn't quite make out what the white background was, but I envisioned (lol rightly or wrongly!) the silver tray sitting on a crisp linen tablecloth.

I'm also submitting this card into the Oldie But A Goodie Challenge (Let it Snow) as everything I used on the card is over 6 months old, the Addicted to CAS Challenge #2 (Bauble) and the Red Carpet Studio Challenge (use either a snowman or snowflake).

I can't believe I've posted twice in the one day. That's double the amount of posts I had in the whole of November - it's great to be back!

Monday, November 5, 2012

Merry Christmas Ornament

I was so excited when my dear friend Linda sent me (among many other yummy goodies!) a new Hero Arts Stamp & Cut Set which is exclusive to Archiver's - thanks again, Linda:) The Christmas Ornaments set has three gorgeous ornaments and a die for cutting them out - yay I'll have some Christmas cards made in no time!

Merry Christmas Bauble
Stamps (Hero Arts) - Christmas Ornaments, Aspen Happy Holidays & Very Merry Christmas

To start with I clear embossed and cut out the branch to hold the ornament. I've been using red felt on some other project I've been making so decided to die cut the felt as a backer to the embossed ornament. The ornament and sentiment were embossed and I added lots of bling to finish. Hero Arts' November Challenge includes using bling and dry embossing so I'm submitting this card into the challenge.

I had a great time yesterday with a couple of my friends at the Knitting and Stitching Show and was hoping to show lots of photos here. But a lot of the exhibitions and stands had a no photography policy, so I hardly took my camera out at all. I did get a photo of this gorgeous little box which I fell in love with. Unfortunately the box was out of stock, but hopefully I'll be able to pick one up again - I just need to track down the pamphlet I picked up for that particular shop! It would be a great project for using up paper scraps and stamped images from my stash.


Hope you all had a great weekend!


Saturday, October 6, 2012

Happy World Card Making Day!

Happy World Card Making Day! Isn't it just wonderful for card makers all around the world to have a special day to celebrate making cards and have a really good excuse (not that we ever need one!) to get up to our eyes in ink?


Today I'm trying to make a batch of Christmas cards. Usually I make a different card for everyone but have never quite managed to make all of my own Christmas cards and always end up (shock, horror!) buying some. So this year I'm going to try make a few cards of each design I come up with. There's no guarantee I still won't end up buying cards at the last minute but hopefully this will help.

So now onto the first card. I have to say I'm totally in love with the adorable reindeer in Hero Arts Christmas Reindeer set - every time I see their cute little faces I have to smile! This card started off as an attempt at a CAS card but I never seem to be able to restrain myself from adding bits and pieces!

Red Nosed Reindeer
Stamps (Hero Arts) - Christmas Reindeer & Very Merry Christmas

The second card has the other reindeer from the Christmas Reindeer set. This guy looks like a fun character so I had to put him in the middle of a snowball fight.

Snowball Fight
Stamps (Hero Arts) - Christmas Reindeer, Very Merry Christmas and Magical Background

I wouldn't have been able to make this last card without my very good friend Linda, who send me a big batch of something I've been trying to get here for years - glossy paper that somehow actually lets alcohol inks and the blending solution do their magic - thanks again so much, Linda:) Making this card even brought the smell of Christmas into the house. I've haven't used StazOn in a long time but as soon as I opened up the pad, it reminded me of the almond paste my mum makes for Christmas cakes - yummy!

Nativity Scene
Stamp (Hero Arts)- Christmas Blessings

Thanks so much for visiting and I hope you are having a fantastic World Card Making Day:)


Sunday, March 25, 2012

Love and Laughter Card with Brooch

I love making fabric brooches and as I have been making quite a few recently decided to make one as an embellishment for this card.

I made the flower brooch using various size circles of a couple of different fabrics and some gems.

Close up of Flower on Card

For the background I stamped some kraft card with white ink. The ink looked very bubbly on the stamp (don’t know if it’s going off or something!) but I liked the textured look it gave when I stamped it, so just left it as it was. I used some of my scraps for the scallop piece. The sentiment is from a gorgeous Christmas set (thanks again Linda!) and I just didn't ink the Christmassy part of it.

I’m submitting this card into the DIY Embellishments Challenge in the Moxie Fab World, the Lily Pad Cards Flower Challenge and the current Hero Arts Challenge.

Love and Laughter Card with Brooch
Stamps (Hero Arts) – Classic Fabric Design & Very Merry Christmas (sentiment)

We have had the most glorious weather this weekend and so have spent more time in the garden then my stampy space. Hope the weather is good wherever you are!
Related Posts with Thumbnails