Showing posts with label Eliza Snowflake. Show all posts

Saturday, November 17, 2018

Sparkly Gift Tags

I really enjoyed joining in on Simon Says All That Glitters is Gold Challenge so when I woke early this morning gathered together some supplies to get a start on Christmas gift tags for bottles.


Dies - Eliza & Kate Snowflakes (Simon Says Stamp), Fancy Cut Christmas (Hero Arts), Circle Nestabilites (Spellbinders) and Stitched Circles (Pink & Main)


I think shaker cards are so fun so made a shaker to go on my first tag. I adhered five glittery gold stars to the plain black background of the shaker element, added a mix of sequins and stars and used a gold frame over the acetate to trap all the shaker pieces inside. A pretty bow, not made by me but recycled from a box of chocolates, finished off the look I wanted.


I love the way my friend Linda used a die to emboss the background on her bicycle card here. So I did the same with the Eliza Snowflake die on this tag, added the Kate Snowflake cut from glittery card and a little gold gem to the centre of the snowflake.


When I was taking photos of the tags on the bottles who should come along with his own bottle of Buck's Fizz looking for a chase - Toby! I don't know if it was coincidental or if he recognised the similarities between what I had and one of his toys, but I had a good laugh when I saw him and managed to get him to pose for a few seconds after I chased him down the corridor.


Saturday, December 20, 2014

Secret Santa Swap

Over at the Hero Arts Flickr Group a number of us took part in a Secret Santa Swap and sent a Christmas card, a Christmas ATC and a gift to the person we were playing Secret Santa to.

Char in the US received the parcel I sent to her, so now I can show what I made for her. First up is the card. The background snowflakes were stamped with faded jeans distress inks and I applied lots of diamond stickles to the die cut snowflakes.


Supplies - Stunning Snowflakes (Hero Arts), Eliza and Kate snowflake dies (Simon Says Stamp), WPlus9 Woodland Wreaths and Spellbinders Fancy Tags One

Next up is the shaker ATC I made. Every time I make an ATC I just want to make more and more of them - it's fun working with the small area.


Supplies - Snowman and Snowflakes (Hero Arts), Woodland Wreaths (WPlus9) & Snowflake embossing folder (Cuttlebug)

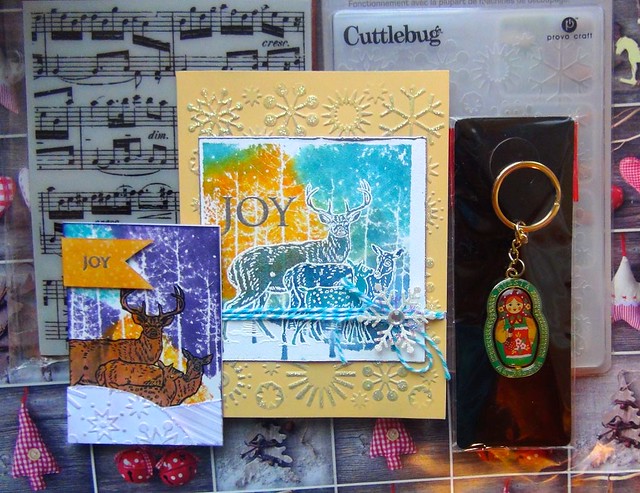
Now I want to share the fabulous package I received from the very talented Maria in Russia. This is Maria's photo of the amazing card and ATC she sent me as well as the wonderful goodies - I'm such a lucky girl! Thank you so much again, Maria, I am absolutely thrilled with everything:):)

Secret Santa surprise for Heather

Tuesday, October 28, 2014

Scrappy Snowflake Tags

The other day when I was making this card my first attempt at a watercolour background looked really hideous. When this happens I usually set the piece aside and see if I can come up with another use for it. Often the not so nice pieces are die cut into butterflies or flowers but in this case I die cut some snowflakes to make gift tags for Christmas. Sorry for the gloomy photos but it's a really dull day here today.


Dies - Simon Says Stamp (Eliza and Kate snowflake dies) & Spellbinders (Picot Edge Circles)

I used the inlaid die cutting technique, and between using the scrapped watercolour panel and scraps of white card left over from other projects, I was happy with the amount of scraps I used up.


To finish the tags I added some gems and baker's twine.


I'm not quite ready to wrap my Christmas pressies yet (in fact I haven't even bought one Christmas present yet!) but just wanted to see how the tags would work on a present simply wrapped with tissue paper and baker's twine.


I'm submitting these tags in Simon Says Stamp's Watercolour Challenge over on Flickr.

Sunday, October 26, 2014

Joyful Flurry

I wanted to join in again on the Simon Says Stamp Watercolouring Challenge over on Flickr, so last night I got out some purple and blue watercolour paints to make a background. I much prefer the colour of the card in real life compared to how it appears in the photo. In real life it's more purple than blue, but for some reason my camera seems to be picking up the blues more than the purples no matter how many photos I've taken in different lights! Anyway you'll just have to imagine this card as being purple:)


Dies - Simon Says Stamp (Eliza & Kate snowflakes), Die-mamics (By the Letters), Memory Box (Bristol Snowflake)


To make the background I applied water to watercolour paper and then added the paint. Then I sprinkled some salt on parts of the panel. I wasn't quite sure how that would work out but I like the look it gave to the panel.


Then it was just a matter of scattering snowflakes on the panel. I used Simon Says Stamp's Eliza and Kate snowflake dies, a snowflake punch and some pretty snowflakes my friend Linda had sent me. For some sparkle I added sequins and gems. I die cut the sentiment a number of times from silver card, layered the letters and added silver glitter to the top layer.


Hope you're enjoying the weekend. Tomorrow is a bank holiday for us so we're looking forward to the extra long weekend and mid-term break from school.

Sunday, October 19, 2014

Snowflake Christmas Ornament

Every year I seem to have a mad dash in the lead up to Christmas as I try to make a lot of Christmas cards to send to family and friends. So shortly after last Christmas when I was talking to my friend Linda we thought it would be a great idea to make two Christmas cards each month throughout the year to save the flurry of cardmaking before Christmas. Well Linda is all up to date (and maybe even a little ahead) in her cardmaking, but let's just say I'm not!

So I decided to pull out some supplies again this morning to make another Christmas card.

Snowflake Ornament

Dies (Simon Says Stamp) - Eliza Snowflake & Kate Snowflake
Stamp (Lawn Fawn) - Trim the Tree


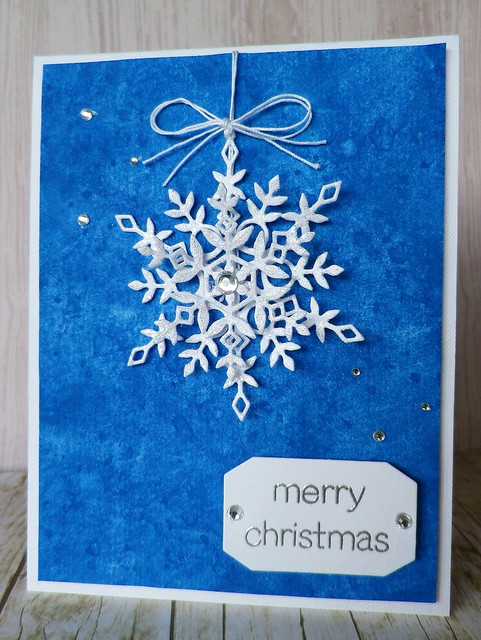
Over at the Simon Says Stamp group on Flickr Barb has a fun challenge going on which is watercolouring. So I thought I'd make a watercolour background for a snowflake Christmas ornament. I used three watercolour paints (two blue & one white) to make the background. I think there are layers and layers of paint on the panel at this stage as I'd be just about happy with it when I'd add something and mess it up! Anyway when I had an okay background I decided to call a halt and just added a few more splashes of paint.

Next it was time to make the ornament. When Simon Says Stamp released a whole range of pretty snowflake dies last year I fell completely in love with them. For this card I die cut two different snowflakes and applied star dust stickles to them.

IMGP4469

After the snowflakes had dried, I layered them together using foam pads and added some string to suspend the ornament from the panel. The sentiment was embossed in silver and to finish off the card I added a sprinkling of gems.

I'm so happy to have my quota of Christmas cards made for this month, now I just have to catch up on the rest of the cards I was supposed to make throughout the year!

Monday, June 23, 2014

Turning Snowflakes into Flowers and a Bit of Blarney

In this post I used the pretty Simon Says Stamp Kate Snowflake die to make a border and today pulled out another very pretty snowflake die from Simon Says Stamp called the Eliza Snowflake, to see what non Christmassy thing I could make with it.
IMGP3239

Die (Simon Says Stamp) - Eliza Snowflake, Stamp (Hero Arts) - Be Happy


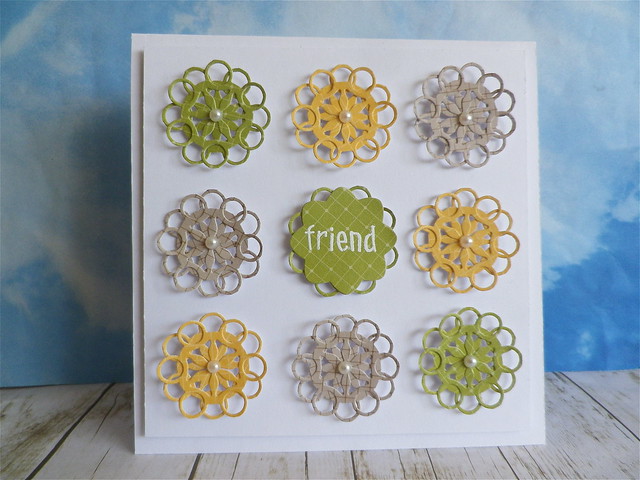
I thought I'd try to make some flowers this time and cut out the bits and pieces I needed from Studio Calico (Snippets) patterned papers.


After die cutting, I trimmed away the pieces I didn't need and layered two pieces to form a flower.


To finish the flowers I added a little pearl to the centres. The sentiment was embossed on another die cut (Dahlia Nestabilities) and I stuck little pieces, from the snowflake die cut, to the back so that rings peek out between each petal.

I'm submitting this card into Simon Says Stamp Work It Wednesday Challenge and Simon Says Stamp You Gotta Have Friends Challenge

The past few weeks have been busy, busy here so I'm only getting around to posting some more photos of the little trip Linda and I did around the place. Next stop is Blarney Castle.

A beautiful walk, by a little stream, leads to the castle. It was lovely to hear the babbling sounds of the stream and all the birdsong as we made our way to the castle. We were blessed with the weather that morning, it was absolutely glorious.


Both of us skipped kissing the Blarney Stone. I have to say with my head for heights, dangling backwards out over a castle wall doesn't really appeal to me! But in this photo you can see a lady (beside the man in the red jacket) who is just about lean out and go for it - better her than me:)


I enjoyed the views instead and will just have to do without the gift of eloquence!


After visiting the castle we had a lovely stroll around the grounds. There was a fascinating poison garden beside the castle, but I must have been so intrigued with it I forgot to take any photos! I loved the fern garden which has some of the biggest ferns I've ever seen.


Winding through the walks we could tell the wild garlic was in full bloom - the faint smell of garlic wafting in the breeze was lovely.


Blarney House wasn't open when we visited but I enjoyed seeing it again and....


...spotting the wonderful features like this water spout.


We couldn't have picked a better time of the year for our visit with the bluebells and rhododendron in full bloom.


Hope you enjoyed the little bit of Blarney:)


Related Posts with Thumbnails