Showing posts with label Scallop Borders. Show all posts

Thursday, May 19, 2011

Thanks a Million

This is a card I made recently using a lot of my favourite things – the particular stamps, hand dyed fabric and some stitching.

Thanks a Million:)
Stamps (Hero Arts) - Antique Engravings, Scallop Borders, Thank You and Envelope Pattern.

To start with I stamped the butterfly on a piece of hand dyed fabric. Then I sandwiched a piece of wadding between it and another piece of the same fabric. I added some tight machine stitching to the butterfly and trimmed close to the stitched outer edges.


The bottom part of the panel was stamped with the Thank You and Envelope Pattern backgrounds using tumbled glass distress ink. The Scallop Borders were also stamped with the same ink and attached to the card with some machine stitching.

I'm still without my usual pc so hope the photos are okay!

Friday, February 25, 2011

Hero Hostess Cooking Up Challenge

The Hero Hostesses in the Hero Arts Flickr group are hosting a Cooking Up Challenge. Each of us has cooked one of our favourite recipes and is sharing a project inspired by our cooking. I baked a carrot cake and gluten free carrot cake buns. Both recipes are at the bottom of the post.

Carrot cake and a gluten free carrot cake bun.

I love carrot cake and my hubby loves it too but since he was diagnosed as a coeliac a few years ago I usually make the gluten free version. Sometimes gf baked goods like scones and pastry can taste quite dry, but because carrot cake is moist the gf version is as nice as the one using ordinary flour. Normally I’d never put both of these on the same plate in case some gluten got on the gf version but just did so for the photo – it meant an extra bun for me too! If you’d like to take part in the challenge the details are here. I’ll be sending a prize out to a winner picked by a random drawing. The prize will include the cookbook in the photo, "101 Cupcakes and Small Bakes", plus some other small goodies that I'll get when I’m shopping over the weekend.

Cooking up challenge
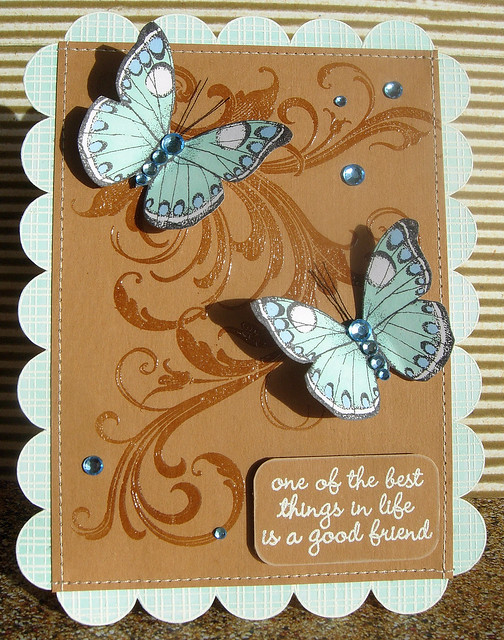
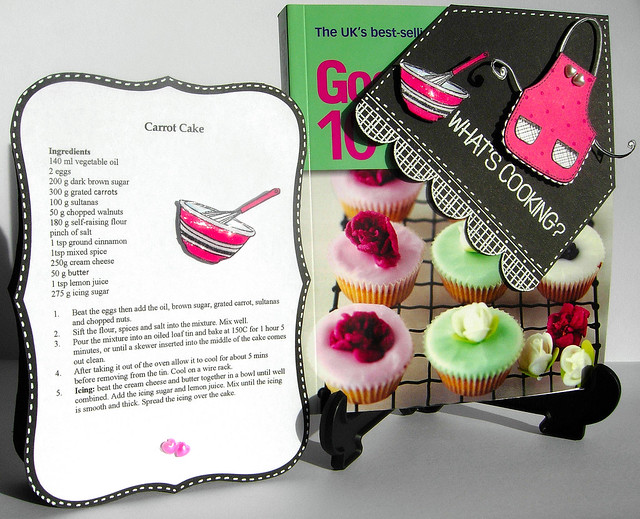
Stamps (Hero Arts) – What’s Cooking, Envelope Pattern, Scallop Borders and Raindrop Background.

When I'm cooking, I usually sling on an apron which is mainly black and has touches of hot pink and white, so that's what inspired my projects. The recipe card is in the form of a card so that it will stand up when I’m baking. On one side there is the ordinary recipe and on the other the gf recipe. I paper pieced the bowl and whisk, added Glossy Accents, the cute Hero Arts heart pearls and lots of faux stitching. I came across a wonderful tutorial on making corner bookmarks here and have made lots of different ones - it's a great way of using up scraps. The apron, bowl and whisk are paper pieced and I added Glossy Accents to the bowl. The scallops and sentiment are embossed in white. I just added lots of faux stitching and the pearl hearts to finish.

I'm submitting these project to the Paper Piecing Challenge in the Moxie Fab World.

Carrot Cake

Ingredients
140 ml vegetable oil
2 eggs
200 g dark brown sugar
300 g grated carrots
100 g sultanas
50 g chopped walnuts
180 g self-raising flour
pinch of salt
1 tsp ground cinnamon
1tsp mixed spice
250g cream cheese
50 g butter
1 tsp lemon juice
275 g icing sugar
1. Beat the eggs then add the oil, brown sugar, grated carrot, sultanas and chopped nuts.
2. Sift the flour, spices and salt into the mixture. Mix well.
3. Pour the mixture into an oiled loaf tin and bake at 150C for approx 1 hour 5 minutes, or until a skewer inserted into the middle of the cake comes out clean.
4. After taking it out of the oven allow it to cool for about 5 mins before removing from the tin. Cool on a wire rack.
5. Icing: beat the cream cheese and butter together in a bowl until well combined. Add the icing sugar and lemon juice. Mix until the icing is smooth and thick. Spread the icing over the cake.
********************************************************************************************************
Gluten Free Carrot Cake Buns

Ingredients
4oz dark brown sugar
6oz grated carrots
1 tsp mixed spice
1 tsp cinnamon
¼ pint water
8oz gluten free self raising flour (I use Odlums Tritamyl)
6tbsp clear honey
6oz sultanas
3oz chopped walnuts
4oz margarine
2 eggs
7oz low fat cream cheese
1tsp lemon juice
1. In a saucepan mix together the sugar, carrots, spices, water, honey, sultanas, walnuts and margarine.
2. Bring to the boil and simmer for 5 mins. Pour into mixing bowl and leave to cool.
3. When the mixture is cold beat in the eggs and fold in the flour. Mix together well.
4. Put mixture into bun cases and bake at 180 C for approx 15 minutes (until the bun centres spring back up when lightly pressed).
5. Cool on wire rack.
6. Beat the cream cheese and lemon juice together and spread over tops of buns.
7. Top with a walnut.

Monday, February 14, 2011

Butterfly Friends

This is another card I made for this month’s challenge (love, friendship or stamp kissing technique) on the Hero Arts blog.

DSCN7178
Stamps (Hero Arts) - Antique Engravings, Fabulous Flourish, Scallop Borders, Tree Birds and Messages.

I clear embossed the Fabulous Flourish on kraft card. The butterflies were stamped on white card and coloured with ProMarkers. For the scallops I coloured some white card with the same green marker I had used on the butterflies and embossed the scallops in white. The sentiment is also embossed in white and I lightly inked the edges of the sentiment panel with white ink. Then I added some blue gems to finish.

Hope you are all having a wonderful Valentine's Day!

Monday, January 10, 2011

Moonlight and Dragonflies

This card was inspired by two gorgeous cards on page 11 of the 2011 Hero Arts catalogue.

DSCN7003
Stamps (Hero Arts) – Wild Flowers, Antique Engravings & Scallop Borders.

To start with I used a circle as a mask and applied distress inks (shabby shutters, broken china and faded jeans) to white card. After the mask was removed I stamped the Wild Flowers image twice and added some beautiful gems which Maureen and Sue had kindly sent me – thanks again girls! The dragonflies were stamped on glossy paper which had been covered with alcohol inks. I silver embossed the scallops on black card and framed the scene. Then I just finished off with a bit of machine stitching.

I'm submitting the card into these challenges:

Hero Arts - Inspired by the 2011 Catalogue & Card Insides.

Moving Along with the Time challenge - Ring out the old Ring in the New. Old stash (silver embossing powder & glossy paper) & new stash (gems from friends)

Cute Card Thursday Challenge 146 - Out with the Old. Old stash - silver embossing powder & glossy paper.

Double Dutch Challenge #59 - Make a Scene (using masking).

Stampin' for the Weekend Challenge - New and Blue (the gems)


Now I'm off to see if the Hero Arts blog hop has started!

Friday, September 17, 2010

Swirling Autumn Leaves

The starting point for this card was when I saw the Offset Scallop Gallop Challenge in the Moxie Fab World. I really liked the idea of using offset scallops on a card and wanted to use an autumn theme for Jenny’s "Fall into Autumn"challenge and Hero Arts’ “Everything Autumn” challenge.

Swirling Autumn Leaves
Stamps (Hero Arts) Scattered Leaves, Flourish Background, Scallop Borders and Messages.

I embossed the Flourish Background in white on a piece of fabric from an upholstery fabric sample book. The leaves are clear embossed on scraps of upholstery fabric. Because the embossing is all over the leaves they didn’t fray when I cut them. Even if they did fray I wouldn’t mind because it would give that tattered autumn look. I clear embossed some pieces of card with a scallop from the Scallop Borders set and layered them. To finish I just added some gems and machine stitching.

I hope you all have a great weekend!

Wednesday, September 8, 2010

A few of my favourite things gift bag

Part of the Hero Arts' challenge this month (Everything Autumn) is to make a gift bag. Sometimes I recycle bags from shops and use them for gift bags and here is the one I used today.


I decided to add a few of my favourite things to the bag - the Large Flower, Scallop Borders and fabric. To start with I cut a piece of upholstery fabric from a sample book for the background. Then I white embossed the flowers on vellum and embossed parts of the petals using sparkling stardust embossing powder.

A few of my favourite things giftbag
Stamps (Hero Arts) - Large Flower & Scallop Borders

I layered the flowers and added assorted beads and pearls to the centres. For the scallop edging on the top of the bag I white embossed one of the scallops from the Scallop Borders set and applied worn lipstick distress ink. I used some left over pieces of tulle for the handles.


It's such a cloudy day here today so I'm afraid the photos aren't great and don't capture the sparkle on the flowers.

Thursday, August 19, 2010

PaperPlay Challenge – Pink It Up.

The challenge on PaperPlay this week is “Pink It Up”. So it’s time for you all to have fun and go crazy with pink!

Bunny Zoe’s Crafts is kindly sponsoring this week’s challenge and I know the lucky winner will have a great time shopping here.

I love using pink, white and black together and decided to “pink up” my card with the background, gems, flower and beads.


Vellum Starburst, originally uploaded by heather maria.

Stamps used (Hero Arts):- Starburst Lace, Scallop Borders, Lace Background & Messages.

I clear embossed the pink background with the Lace Background stamp and white embossed the Starburst Lace and scallops on vellum. To add another layer to the Starburst, I embossed the flower centre of the Starburst Lace again on vellum, snipped towards the centre and curled the petals a bit. Sue (Stampersuzz) sent me lots of gorgeous goodies recently, including a beautiful ribbon of velvet flowers so I snipped off one of the flowers and added a pearl to the centre. Thanks again Sue! To finish I added pink gems and a sprinkling of beads with a pinkish tinge.


I’m submitting the card into Jenny’s Challenge # 18 which is to use buttons, brads or bling on a card and am also submitting it into Hero Arts’ Keeping in Touch and Back to School Challenge.

I’m looking forward to seeing lots of gorgeous pink creations this week!

Monday, June 14, 2010

Can't leave that large flower down!

I have really fallen for the Large Flower stamp by Hero Arts and I know it will be one of those stamps I will use over and over again - no dust will gather on this one!

Here's a card I made recently using this stamp. Before machine stitching the flower I made a "sandwich" of a piece of fabric, wadding, snippets and threads of organza, a piece of organza. For the leaves, I stamped a leaf from the Scattered Leaves set (Hero Arts) on cotton fabric, layered it on another piece of fabric, zigzag stitched around the edges and cut out.


Here are some more cards I've made using this stamp.

Organza again


Vellum


A couple more!


Friday, June 11, 2010

Some Fun With Fabrics

I used to do a bit of quilting but once I started making cards that kind of took over. But I still love to go through my fabric stash and use bits and pieces of fabric on some of my cards. These are a few cards I made recently using fabric.

For this one I stamped a piece of hand dyed fabric with the Large Flower from Hero Arts, layered with wadding and a stiff piece of fabric and machine stitched. The flower centre and background are pieces of upholstery samples.


Stamps (Hero Arts) Large Flower, Woodgrain Circle, Birthday Messages.


I had to try a tutorial I came across on making organza flowers. Various size circles are cut out of organza and the edges are curled by holding them over a flame. The organza circles are then layered to form a flower.


Stamps (Hero Arts) Branch Background, Scallop Borders, Birthday Messages, Scattered Leaves.

Since I don't get to make many quilts anymore, I thought it would be fun to make a mini quilt for this card using up little scraps of fabric. I was over the moon the other day to see that the card had been picked as one of the winners of the Moxie Fab World Fun with Fabrics challenge.


Stamps (Hero Arts) Sew Original, Birthday Messages.

Hello and Welcome!

Well I never thought I'd be saying this, but hello and welcome to my new blog!

I thought I'd start with a couple of cards I made for the June challenge (Summer Fun & 4th July) at Hero Arts

As soon as I saw the Flourish Grids stamp set by Hero Arts, I knew I'd have to get it and this is my first card using this set.


I applied broken china and faded jeans distress inks to the upper part of a panel of white card and spritzed with water. Then I sponged the base of the panel with shabby shutters distress ink. For the flowers I used two pink chalk inks to get a few different shades. The flowers have diamond stickles centres. Originally the background was white card which I sponged with worn lipstick distress ink and stamped randomly with the flourish background using water.

Stamps
(Hero Arts) Flourish Grids, Scattered Leaves, Flourish Background, Birthday Messages, Dolls
.


For the second card I used a stamp which is my absolute favourite - Large Flower by Hero Arts. I just saw that the Crafty Angels challenge this week is using your favourite stamp so I'm entering this card.


The flower is embossed in white, covered with distress inks (shabby shutters and broken china) and has four layers. The scallops and sentiment were also embossed in white and covered with worn lipstick distress ink. For the card itself I lightly applied shabby shutters and broken china distress inks to white card and splattered water on it. I just added some machine stitching and beads to finish.


Stamps (Hero Arts) Large Flower, Scallop Borders, Birthday Messages.


Related Posts with Thumbnails