Wednesday, December 24, 2014

Last of the Tags and Happy Christmas

This Christmas Eve has been very relaxed with no work and no major shopping left to do. So when my older son asked me to make some gift tags to put on his pressies for us, I made made them straight away, and since I had all the bits and pieces out, made ten more for next Christmas. Now hopefully in 12 months time I'll remember where I've put them!

Here are the first three tags I made today with a Docrafts die that I have used so many times this year in the lead up to Christmas - love it!


Die - Do Not Open Tag (Docrafts)


The tags were mainly made from card scraps. I used one of the new techniques that I came across and loved this year - inlay die cutting. I'm submitting these tags into Simon Says Stamp's Anything Goes Challenge.

Now I’m off to do a bit of preparation for tomorrow so I want to wish you a very Happy Christmas and hope that you will enjoy good health, happiness and lots of inky fun in 2015!


Saturday, December 20, 2014

Secret Santa Swap

Over at the Hero Arts Flickr Group a number of us took part in a Secret Santa Swap and sent a Christmas card, a Christmas ATC and a gift to the person we were playing Secret Santa to.

Char in the US received the parcel I sent to her, so now I can show what I made for her. First up is the card. The background snowflakes were stamped with faded jeans distress inks and I applied lots of diamond stickles to the die cut snowflakes.


Supplies - Stunning Snowflakes (Hero Arts), Eliza and Kate snowflake dies (Simon Says Stamp), WPlus9 Woodland Wreaths and Spellbinders Fancy Tags One

Next up is the shaker ATC I made. Every time I make an ATC I just want to make more and more of them - it's fun working with the small area.


Supplies - Snowman and Snowflakes (Hero Arts), Woodland Wreaths (WPlus9) & Snowflake embossing folder (Cuttlebug)

Now I want to share the fabulous package I received from the very talented Maria in Russia. This is Maria's photo of the amazing card and ATC she sent me as well as the wonderful goodies - I'm such a lucky girl! Thank you so much again, Maria, I am absolutely thrilled with everything:):)

Secret Santa surprise for Heather

Thursday, December 11, 2014

Snowy House Jar

I wanted to play along again with Hero Arts' Deck the Halls Challenge and Simon Says Stamp's Bling It On Challenge and used an empty jam jar and some stamps to make a holder for a night light candle.


Stamps (Hero Arts) - Snowy House & Christmas Reindeer

I started by making snowdrifts which encircle the jar and added shimmer with a layer of diamond stickles. After stamping and cutting out the house I cut out the windows and added a vellum backing so that the candle light would shine through. I coloured the vellum with a yellow maker so that there would be a warm coloured glow from the windows when the candle is lit.


After colouring the rest of the house I added lots more stickles and nestled it in the snowdrifts. The trees were stamped on patterned paper and some gems were added.

My camera doesn't seem to like taking photos in the dark but this is what the jar looks like when the light is dimmer.


At the moment I have an unscented candle in the jar but will use pine and cinnamon scented night lights in it too.

Tuesday, December 9, 2014

Oh Christmas Trees

No doubt like lots of you I'm fairly busy in the run up to Christmas but am enjoying all the preparations. Maybe one of these years I'll start my Christmas preparations a bit earlier than usual! Anyway I think I'm nearly there with the cards I want to make this year but took a little break away from card making to join in on Hero Arts' Deck the Halls Challenge.


I love little felt decorations so decided to make some to pop on my tree using dies from Hero Arts Merry Christmas Tree stamp and die set. To start with I die cut felt Christmas trees and then die cut green felt circles (from the same Hero Arts set) and a red heart.


Dies - Merry Christmas Tree (Hero Arts) & Bundle of Stitched Shapes (Simon Says Stamp)

Then I decorated the trees with buttons, stitching, sequins and gems. After the trees were complete I added either ribbon or baker's twine between the tree front and back then stitched the outlines and added wadding before finishing the stitching.


As I had the Christmas tree die out I decided to make another card with a removable decoration.


This time I used up lots of green scraps by putting them in rows of strips, cutting and then cutting again to make a patchy background. After die cutting the tree twice I sandwiched ribbon between the two trees and added buttons to finish. Then I added the tree to the embossed background with glue dots so that the ornament can be removed and used.

I was determined to use up every bit of the scrap background I had left over from making the tree so ended up die cutting shamrocks to put aside for next St Patrick's Day using a sweet die my friend Linda gave me. I've definitely never been this far ahead of myself before for a celebration!


Die - Shamrock (Impression Obsession)

Friday, December 5, 2014

November CCC

It has been a little while since I participated in one of Deborah Nolan's fun CCCs (Card Chain Challenge) but was delighted to get a chance to take part in the November CCC. It was great fun making a card and receiving a card but best of all was getting to know my lovely CCC swap partners Dagmar in Germany and Betty in the US.

Deborah always gives us plenty of choices for the Challenge. Maybe one of these days I'll actually get to combine a few of these choices but this time I went with the CCC sketch. As I'm in full Christmas card making mode naturally enough Dagmar ended up with an early Christmas card:)


Stamp set - Woodland Wreaths (WPlus9)

I love the Woodland Wreath set from WPlus9 so wanted to use it on the card for Dagmar. To start with I embossed a wreath of berries and then stamped two types of wreaths from the set in different shades of green. I found that the berries ended up being a more vibrant red by doing it this way instead of embossing the berries on a wreath that had already been stamped. Then I stamped the bow, layered it and added a little heart shaped gem. After that I went mad adding stickles to the berries and bow. Christmas is always a good excuse for a bit of sparkle, isn't it?:)


Recently I picked up Docrafts cable knit pattern embossing folder and used that on a strip of kraft card. After embossing the panel I added touches of white ink.

Here is the gorgeous card I was delighted to received from Betty - I just love it and the way she combined so many of Deborah's themes.


Betty, thanks again for the gorgeous card and yummy sequins you included with it:)

Here on Deborah's blog you can see all the CCC cards that when whizzing around the world last month. If you'd like to sign up for the next CCC Challenge you should pop over to Deborah's blog on the 7th December to join in on the fun.

Sunday, November 30, 2014

Bookmarks

I love making bookmarks so when I recently came across Clearly Besotted's Book Worm set, I had to snap it up.


Stamp set - Book Worm (Clearly Besotted)


So this morning I had a little inky time and decided to start making bookmarks to give along with book presents at Christmas. These bookmark have already been taken by my hubby and younger son so I'll have to get cracking on making more to go with pressies!


To start with I cut panels from kraft card and added stitched edges with Simon Says Stamp's Bundle of Stitched Shapes dies. After stamping and cutting out the images, I used Promarkers to colour them. Then I embossed the sentiments, adhered the images and added yarn to finish.


I'm submitting these bookmarks into Simon Says Stamp's Anything Goes Challenge. Hope you are having a great weekend. At the moment I have a cold that I can't seem to shake and as my older son said sound like I've sucked on twenty helium balloons! Hopefully I won't sound too much like Minnie Mouse when I go into work tomorrow:)

Wednesday, November 26, 2014

Christmas Hogs & Kisses

I recently got Simon Says Stamp's Birthday Farm Animals set and since I love the images and am still in full Christmas card making mode thought I'd use one of the funny farm animals on a Christmas card.


Stamps - Birthday Farm Animals (Simon Says Stamp), Trim the Tree & Sweet Christmas (Lawn Fawn) and Happy Holidays & Designer Snowflakes (Hero Arts)

To start with I clear embossed snowflakes on kraft card, added some white card at the bottom and cut this background out using one of the dies from Simon Says Stamp's Bundle of Stitched Shapes set. Then I had some fun with the little hog. After cutting him out and colouring him with Promarkers, I changed his party hat into a Santa hat and gave him a present and candy cane to hold from Lawn Fawn's Trim the Tree set. Then I die cut a speech bubble from Clearly Besotted's You Said It die set and used a mix of sentiments from Simon Says Stamp (Birthday Farm Animals) and Lawn Fawn (Sweet Christmas). To finish I added a tiny pom pom to the Santa hat and frosted lace stickles to the brim of the hat and on the ground. It's really foggy here today so unfortunately I didn't manage to capture any of the subtle shimmer in my photo.

I'm submitting this card into a few Simon Says Challenges - the Flickr Challenge #6 (die cutting), the Anything Goes Challenge and the Work it Wednesday Challenge (anything goes). I'm also submitting the card into The Die Cut Diva's Any Holiday Challenge.

Wednesday, November 12, 2014

Snowman Shaker Tag

I want to make some more gift tags for Christmas and this time used the cute snowman from the Snowman and Snowflakes stamp by Hero Arts on my shaker tag. To start with I made the little shaker part by embossing snowflakes on white card, applying salty ocean distress ink and spritzing on some water. As I wanted my snowman to be on the outer part of the shaker I then trapped tiny beads and sequins between the background and acetate\die cut frame layer.


Stamps (Hero Arts) - Snowman and Snowflakes, Christmas Reindeer (snowflakes) & Stamp and Cut Ornament (sentiment)


Then I stamped the snowman a number of times, cut him out and did my colouring with ProMarkers. After layering his hat and scarf I added some diamond stickes to the white parts of the scarf. Then the shaker part of the tag was added to the die cut backing piece and thread added to finish. I'm submitting this tag into Hero Arts' Holiday Challenge (Tag It category) and The Die Cut Diva's Any Holiday Challenge.

Sunday, November 2, 2014

Sequin Ornaments and Gift Tags

This year I'm hoping to make more Christmas cards to send than I managed to make last year - hope you're not getting sick of all the Christmas stuff on my blog!

My friend Trinh sent me a gorgeous collection of sequins in a wonderful range of colours and I wanted to use some of them on my cards and gift tags.


Stamps & Die set - Hero Arts Stamp and Cut Ornament


To make the card I die cut ornaments windows in panel of kraft card, embossed it with Darice's Snowflake Trim folder and lightly inked the edges with white ink. The sentiment was embossed. I then cut ornaments from red glitter card, stuck sequins on the ornaments and popped them behind the windows in the kraft panel.


To complete the card I added thread and gems.

As I had two die cut ornaments left over from cutting out the windows on the card, I decided to use them to make a couple of gift tags to go on pressies. I have a huge roll of brown parcel paper (that seems endless!) so used some of this to wrap a present. To make the wrapping paper I embossed some snowflakes and added gems and baker's twine.

The first tag was made by embossing an ornament in white and adding a sequin and gem to the centre.


Hero Arts - Designer Snowflakes set & Stamp and Cut Ornament


The second tag is supposed to match the card so I again embossed an ornament on the die cut and cut out the centre piece. Another ornament was die cut from red glitter card and after I added sequins, I adhered the upper layer with some foam pads.


Hero Arts - Designer Snowflakes set & Stamp and Cut Ornament


I'm submitting these projects into Hero Arts' Holiday Challenge (Anything Goes & Tag It), Simon Says Stamp's Anything Goes Challenge, Die Cut Diva's Any Holiday Challenge and a2z Scrapbooking Anything Goes Challenge.

Hope you're enjoying the weekend. After two very wet and windy days it's wonderful to see the sun shining here again today!


Thursday, October 30, 2014

Poinsettia Tag Card

I had a bit of time today to make another Christmas card and, thanks to my friend Linda W, used a lovely poinsettia image from Hero Arts' new Peace Poinsettias set.


Hero Arts Stamps - Peace Poinsettias, Lattice Background, Stamp and Cuts Ornament & Merry Merry Decorate It set

I started by embossing a white piece of card with the holly ribbons folder from Cuttlebug. Then I die cut a tag, stamped the lattice background in gold ink from the Merry Merry Decorate It set and added ribbon. After cutting out the poinsettia flower and leaves, I added beads to the flower centre and a layer of crackle accents.


The sentiment was embossed in gold. I'm submitting this card into the Mad About Metallics and Tag It categories in Hero Arts' Holiday Challenge and Simon Says Stamp's Anything Goes Challenge.


Tuesday, October 28, 2014

Scrappy Snowflake Tags

The other day when I was making this card my first attempt at a watercolour background looked really hideous. When this happens I usually set the piece aside and see if I can come up with another use for it. Often the not so nice pieces are die cut into butterflies or flowers but in this case I die cut some snowflakes to make gift tags for Christmas. Sorry for the gloomy photos but it's a really dull day here today.


Dies - Simon Says Stamp (Eliza and Kate snowflake dies) & Spellbinders (Picot Edge Circles)

I used the inlaid die cutting technique, and between using the scrapped watercolour panel and scraps of white card left over from other projects, I was happy with the amount of scraps I used up.


To finish the tags I added some gems and baker's twine.


I'm not quite ready to wrap my Christmas pressies yet (in fact I haven't even bought one Christmas present yet!) but just wanted to see how the tags would work on a present simply wrapped with tissue paper and baker's twine.


I'm submitting these tags in Simon Says Stamp's Watercolour Challenge over on Flickr.

Sunday, October 26, 2014

Joyful Flurry

I wanted to join in again on the Simon Says Stamp Watercolouring Challenge over on Flickr, so last night I got out some purple and blue watercolour paints to make a background. I much prefer the colour of the card in real life compared to how it appears in the photo. In real life it's more purple than blue, but for some reason my camera seems to be picking up the blues more than the purples no matter how many photos I've taken in different lights! Anyway you'll just have to imagine this card as being purple:)


Dies - Simon Says Stamp (Eliza & Kate snowflakes), Die-mamics (By the Letters), Memory Box (Bristol Snowflake)


To make the background I applied water to watercolour paper and then added the paint. Then I sprinkled some salt on parts of the panel. I wasn't quite sure how that would work out but I like the look it gave to the panel.


Then it was just a matter of scattering snowflakes on the panel. I used Simon Says Stamp's Eliza and Kate snowflake dies, a snowflake punch and some pretty snowflakes my friend Linda had sent me. For some sparkle I added sequins and gems. I die cut the sentiment a number of times from silver card, layered the letters and added silver glitter to the top layer.


Hope you're enjoying the weekend. Tomorrow is a bank holiday for us so we're looking forward to the extra long weekend and mid-term break from school.

Sunday, October 19, 2014

Snowflake Christmas Ornament

Every year I seem to have a mad dash in the lead up to Christmas as I try to make a lot of Christmas cards to send to family and friends. So shortly after last Christmas when I was talking to my friend Linda we thought it would be a great idea to make two Christmas cards each month throughout the year to save the flurry of cardmaking before Christmas. Well Linda is all up to date (and maybe even a little ahead) in her cardmaking, but let's just say I'm not!

So I decided to pull out some supplies again this morning to make another Christmas card.

Snowflake Ornament

Dies (Simon Says Stamp) - Eliza Snowflake & Kate Snowflake
Stamp (Lawn Fawn) - Trim the Tree


Over at the Simon Says Stamp group on Flickr Barb has a fun challenge going on which is watercolouring. So I thought I'd make a watercolour background for a snowflake Christmas ornament. I used three watercolour paints (two blue & one white) to make the background. I think there are layers and layers of paint on the panel at this stage as I'd be just about happy with it when I'd add something and mess it up! Anyway when I had an okay background I decided to call a halt and just added a few more splashes of paint.

Next it was time to make the ornament. When Simon Says Stamp released a whole range of pretty snowflake dies last year I fell completely in love with them. For this card I die cut two different snowflakes and applied star dust stickles to them.

IMGP4469

After the snowflakes had dried, I layered them together using foam pads and added some string to suspend the ornament from the panel. The sentiment was embossed in silver and to finish off the card I added a sprinkling of gems.

I'm so happy to have my quota of Christmas cards made for this month, now I just have to catch up on the rest of the cards I was supposed to make throughout the year!

Saturday, October 18, 2014

Sparkling Season's Greetings

I haven't posted in a while but now that I've finished making things to donate to Christmas fairs and am back from our holiday in Disneyland Paris, I'm all ready to get into making more cards for Christmas.

Hero Arts has a great Holiday Challenge going on at the moment with a number of different fun categories. I decided to combine two of the categories - - Mad About Metallics and White Out.


Ornament stamp & die set (Hero Arts) & pine branch die (Impression Obsession)


My good friend Linda sent me a gorgeous new set from Hero Arts called Stamp & Cut Ornament - thanks again, Linda. The set has a few pretty ornaments, a lovely mix of sentiments and a die to cut out the ornaments - love this as it will definitely help speed up my Christmas card making!

To start with I made a card base and using foam pads added a panel which I had embossed using the Snowflake Trim embossing folder from Darice. Linda had also sent me pretty pine branch die cuts from Impression Obsession so I took one of these, embossed it with star dust embossing powder and to add even more sparkle applied a layer of star dust stickles.


I embossed the ornaments in silver, die cut them and then added gems, dots of stickles and thread to suspend them from the branch. The sentiment was also embossed in silver and to finish I added a sprinkling of gems to the background and on the branch.

Hope you are enjoying the weekend. We're having stormy weather with lots of rain and I think it's due to continue on that way for the weekend - it's a really good reason to stay inside and get inky!

Monday, September 29, 2014

Creative Process Blog Hop

Deborah Nolan a very talented, funny and sweet crafter kindly invited me to participate in the Creative Process Blog Hop, a perpetual hop that highlights card makers and provides a look at how they do what they do and why they do it. If you haven’t already visited Deborah’s blog you can find it here. Not only will you get to see lots of wonderful projects, but I guarantee you’ll enjoy giggles along the way with Deborah’s great sense of humour and way with words. Deborah also organises the fun Card Chain Challenge - if you'd like to join in on the current challenge you can find it here.

Everyone who takes part in the hop is given the same set questions. Here are my answers to those questions:

What am I working on now?

The shorter answer would probably be what am I not working on now?! At the moment I’m mainly working on making items, to donate to an animal rescue centre and a special school for children, which will be sold at craft fairs in late November.

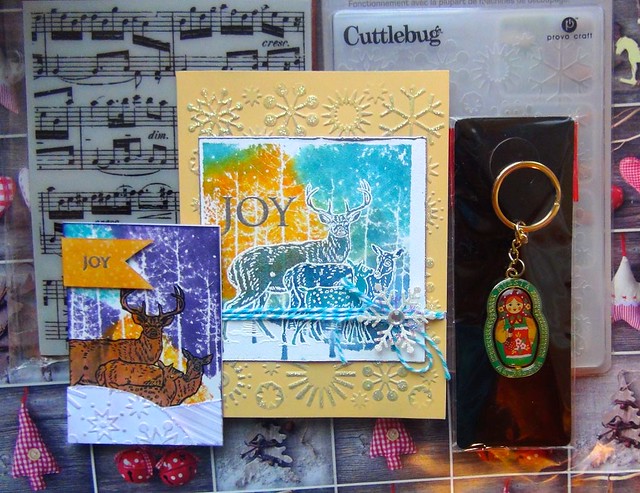
I’ll be making lots of cards with dogs, hoping they will sell well and am using Lawn Fawn’s cute Critters at the Dog Park set (love Lawn Fawn’s generous angel policy). I just wish when I ordered the set from Simon Says Stamp that I also ordered the matching die set! Anyway I’ve made a little start on all the stamping and cutting:)


I’m also making fabric brooches and lavender sachets. I’ve wanted to make lavender sachets for a while and bought some lavender for our garden this year specifically for that purpose. My sister gave me bunches and bunches of lavender from her garden and now that it’s dried out, I’m ready to get cracking on making some sachets. This is just a test piece using upholstery fabric, distress inks and Memory Box stencils my friend Linda sent me – thanks again, Linda.


Earlier in the year my older son made a steampunk airship for one of his art projects in school. A couple of old watches were left over and since he doesn’t want them, I’m grabbing them to make a necklace and something else (I’m not quite sure what yet!). I just love the look of the old watch gears, the more modern watch innards aren’t a patch on them as you can see from this photo.


How does my work differ from others in my genre?

Oh now this is a difficult one! I definitely don’t think I have a particularly distinctive style but I like trying to come up with different ideas. Although I can’t pinpoint how my work differs from others, I feel that everyone’s work differs from others, as can be seen through the wide range of ideas and completely different interpretations of themes that people come up with for challenges or even under time pressure in scrambles.

Why do I create what I do?


Why do I create? Well it’s like an itch I have to scratch, and the itch is only satisfied when I finally get to make whatever ideas I have swirling around in my head. My hubby is similar, but in his case it’s writing music, so he totally understands why I sometimes drop everything to get whatever it is out of my system. Why do I create what I do? As far back as I can remember (and we’re talking a lot of years;) )I’ve always enjoyed crafts and there was always a supply of crafty bits and pieces at home for us to play with. I’ve tried out many crafts over the years but cardmaking has become a firm favourite for a number a reasons, including the wonderful friends I’ve made through cardmaking, how relaxing the whole process is, the fun of putting together something from scratch, the endless number of techniques (and goodies!) that are out there and as someone who couldn’t draw to save her life (or win at Pictionary!) I love having lovely (and recognisable) images to colour and put on my projects. I have to admit that I still have some UFOs from my quilting days, so it is great to have taken up a hobby in which I have no unfinished objects hanging around the place!

How does my creative process work?

Lol another good one that made me think! Well I suppose when I’m making something I usually have a particular family member or friend in mind. So I think about what they might like colour and style wise. Sometimes I know straight off what I’m going to make and other times I haven’t a clue. Even when I know exactly what I want to do, I’d say 80% of the time the idea evolves as I make my card/project. When I’m in my haven’t a clue phase I usually pull out some stamps, embossing folders, inks and dies and mess with my supplies until I’m happy with what I’ve come up with.

I rarely create at night unless I need to make something in a hurry or else if I’m just cutting out bits and pieces or colouring. I much prefer to work early in the morning or during the day – it’s just a pity that thing called work can get in the way a bit for those timings!

Who am I tagging for the next round of the Creative Blog Hop
?

I’m tagging a wonderful friend I’ve made through cardmaking – Trinh Arrieta. Not only is Trinh one of the sweetest people I know but she never ceases to amaze me with the fabulous and creative projects she makes. I’ve lost track of the amount of times I’ve said “wow” when I’ve visited her blog or received one of her brilliant cards. If you haven’t already seen Trinh’s blog you’ll find it here and next Monday she’ll be posting about her creative process – I know that will be a treat for sure!

Thanks for visiting today and well done for making it through my rather long winded post!

Tuesday, September 16, 2014

Trick or Treat Shaker

I finally had a little time to stamp earlier today and I thought it would be fun to join in on Lawnscaping's Critters Galore Challenge.


For my critter I decided to use the bat from Lawn Fawn's cute Trick or Treat set and made a Halloween shaker card. Sorry my photo isn't great - I always find it hard to avoid getting reflections on the acetate layer on shaker cards!

I embossed the sentiment on a piece of green card and die cut the label shape. To make the shaker I added some lovely green sequins my friend Trinh (thanks again, Trinh) sent me and an embossed Waltzingmouse Stamps image (Very Vintage labels No. 10) which I cut out and used as my frame. The Lawn Fawn bat was cut out and coloured with ProMarkers and I couldn't resist adding a couple of googly eyes before perching him on top of the shaker. To finish I just added a strip of lace to the side of the card.

Trick or Treat Shaker

Stamps - Trick or Treat (Lawn Fawn) & Very Vintage labels No. 10 (Waltzingmouse Stamps)

The last time I made a shaker I had a problem with the little bits inside the shaker sticking to the sides of the foam pads but I saw a tip somewhere which suggested rubbing talc or flour on the sticky parts before assembling the shaker. It really seems to have worked well but I'd love to hear if any of you have any other suggestions as it took a while to get rid of all the traces of flour!

Thursday, September 4, 2014

Trick or Treat

I know it might be a bit early to be making Halloween bits and pieces but when I was out shopping earlier I noticed that some Christmas items are already creeping onto the shelves, so maybe I'm not too early for Halloween after all!

Anyway there are a couple of challenges I wanted to play along with - Teri's Fabulous Friday Challenge over at Moxie Fab World and Simon Says Stamp's Stamp It Challenge


The photo above is the one to be used for inspiration for the Moxie Fab World Challenge. It inspired me to make a garland, use yellow, orange and black, and also to use chevrons and triangles. For the Simon Says Stamp Challenge you have to stamp - lol I love nothing better:)

So first up is the little garland. I die cut circles from plain paper and patterned paper. On the orange ones I stamped Hero Arts' Tiny Flags using spiced marmalade distress ink and on the black circle I embossed the Lawn Fawn sentiment from the Trick or Treat set.

IMGP3937

Stamps - Trick or Treat (Lawn Fawn) & Tiny Flags (Hero Arts)

The cute candy corns which are from the same set were stamped, coloured with ProMarkers and covered with glossy accents.

IMGP3909

Next up are a couple of cupcake toppers, again using the same dies and stamps. At Halloween they will be stuck in cupcakes that are spookier than the mini chocolate chip ones I have here:)

IMGP3918

Stamp set - Trick or Treat (Lawn Fawn)

Well since Halloween wouldn't be Halloween without treats, I had to make up a little bag of treats and a tag.

IMGP3934


Stamps - A Little (Hero Arts) & Trick or Treat (Lawn Fawn)


The tag was embossed and pieced and I again added candy corns that had been coloured and glossed. I used baker's twine from a Halloween assortment pack from Doodlebug Design. Only a little over eight weeks to Halloween now but I think these treats might be eaten a little before then;)


Saturday, August 30, 2014

Mark's Monster and Messing with Paints

Earlier today I had fun messing with watercolour paints to make backgrounds. I squirted some watercolour paints from tubes onto my largest acrylic block and added only little splashes of water as I wanted to paint to remain thick and add texture to my panels. Then I squished panels of watercolour card onto the block and ended up with a batch of panels like the ones below.


Lol I haven't a clue what I'm going to do with some of them (the odder looking ones may end up being die cut into butterflies or sentiments!) but I used one of the orange panels to make the background for my card. I stamped Hero Arts Tiny Star Background on the panel in barn door distress ink and embossed the sentiment on a piece of black scrap card. As I don't have any monster stamps I asked my son Mark to draw a few for me. After seeing one of the bigger guys I thought he would be perfect for a sorry card.

Monster image by Mark
Stamps (Hero Arts) - Tiny Star Background & Everyday Sayings

I coloured the monster with ProMarkers and gave him a spotty look with the blender pen. To finish I just added some glossy accents to his horns, eye and tooth.

I'm submitting this card into Simon Says Stamp's Anything Goes Challenge.

Sunday, August 24, 2014

Adam's First Challenges

My twelve year old son Adam was very excited when he heard about Simon Says Stamp's Summer Vacation Kid’s Challenge and this morning decided to make a card before his breakfast.


It took him a bit longer than he thought it would to make the card (lol that happens to me all the time too!) but he just wouldn't take a break for breakfast until he was finished. Well first off he rummaged through my stamps to find all the images he liked and then he drew a rough idea of what he wanted to do.


He particularly loved using the Big Shot and was delighted with how quickly he could cut a strip of grass with it.

Die - Grassy Border (Lawn Fawn)

Something else he really enjoyed was doing the colouring on the dog and ice cream. His first practice stamping is on the piece of scrap paper underneath.

Stamp - Critters at the Dog Park (Lawn Fawn)

Stamp - Fantastic Birthday (Hero Arts)

Here he is sticking the last stamped piece to his card and the final touch was when he added sprinkles to the ice cream.


The bonus was eating the extra sprinkles that he had "accidentally" poured out for the top of the ice cream;)


So here's the end result of all his hard work, fueled only be some sprinkles:)

Stamps - Hero Arts (Be Happy, Picnic & Fantastic Birthday) & Lawn Fawn (Critters at the Dog Park)

I just love Adam's card and all the fun he had from start to finish making it. The super happy dog with the best ever treat in his bowl and the sun with the happy face and sunglasses make me smile every time I look at this card:):) Hope you enjoy it too!

As Adam added texture to his card by using sprinkles he's also submitting his card into Lawnscaping's Texture Challenge.

Related Posts with Thumbnails